Create Your Stellar Vault
Deploy and configure your Soroban vault in 4 simple steps.
Overview
The Stellar Vault onboarding wizard guides you through creating a tokenized vault on Stellar's Soroban smart contract platform. The process involves two wallet roles:
- Issuer Wallet: Creates and controls the asset, mints tokens
- Distributor Wallet: Receives minted tokens, deploys and manages the vault
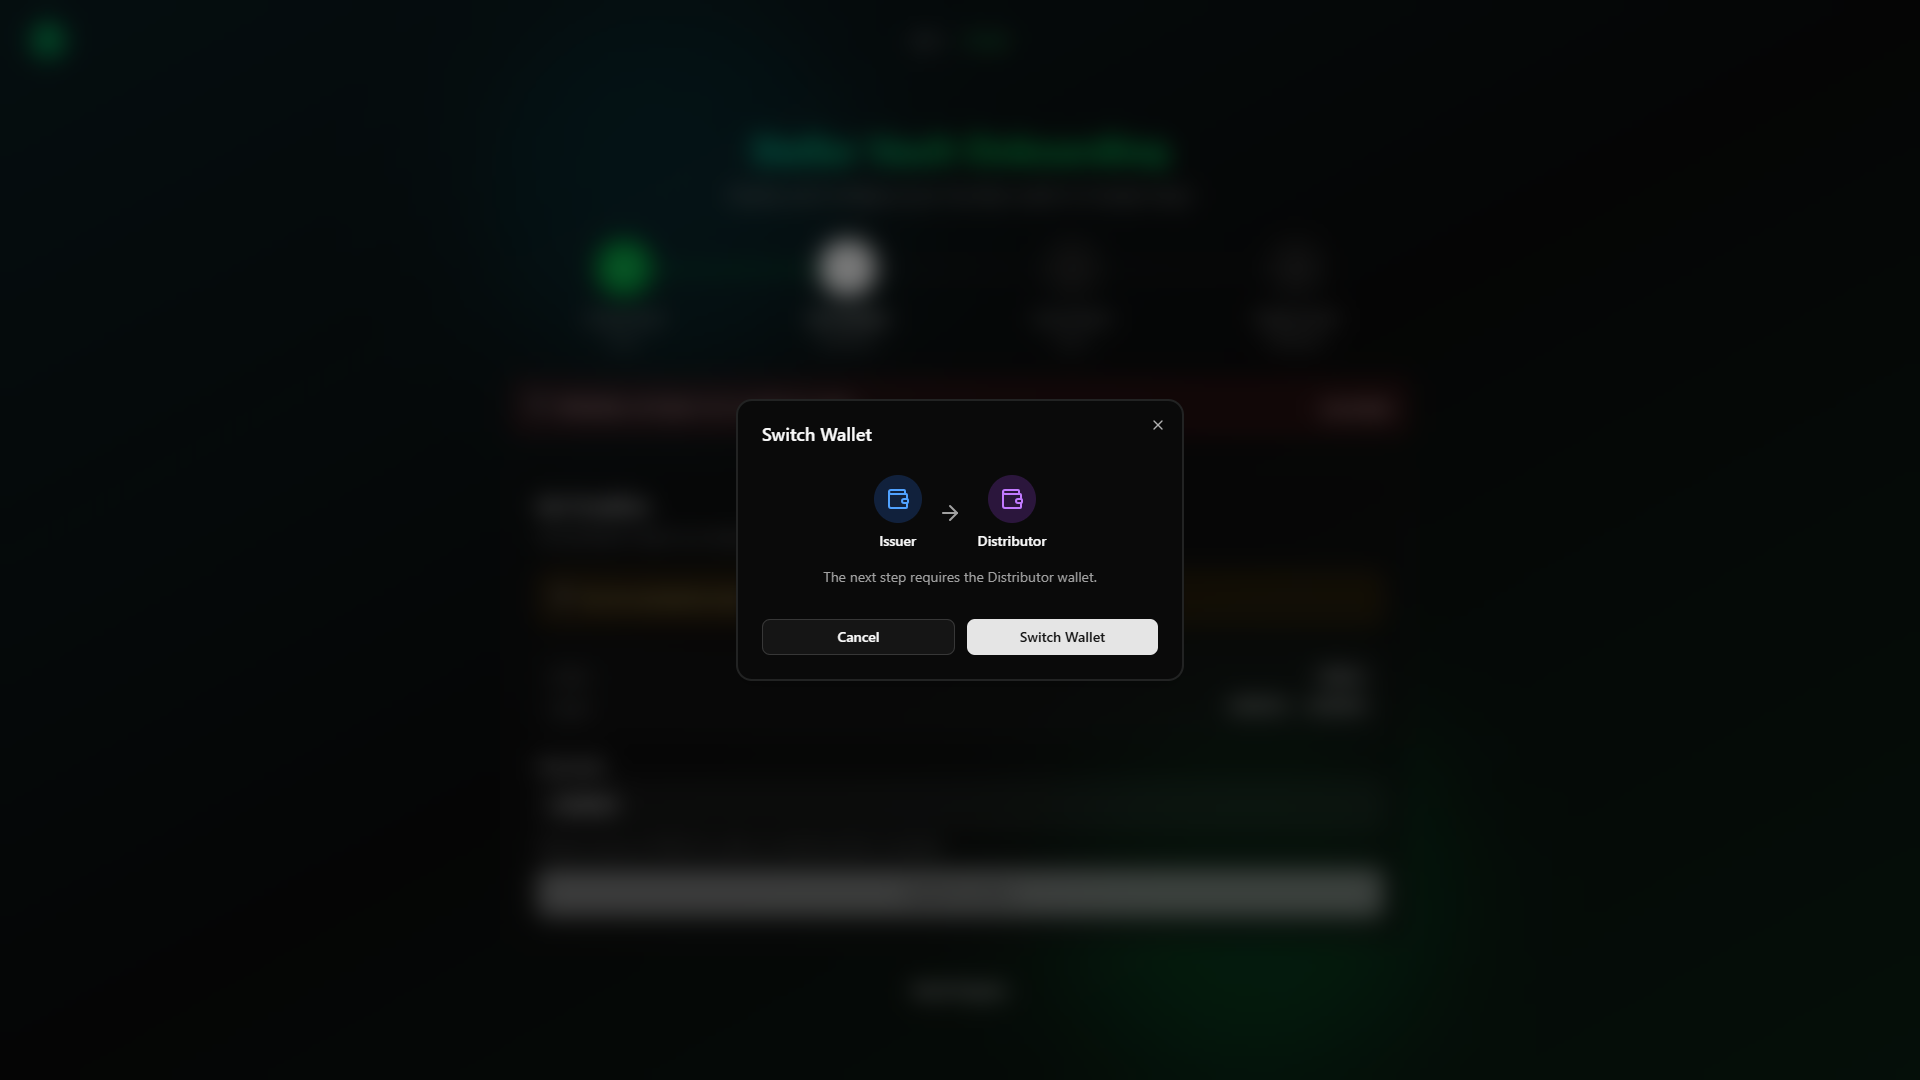
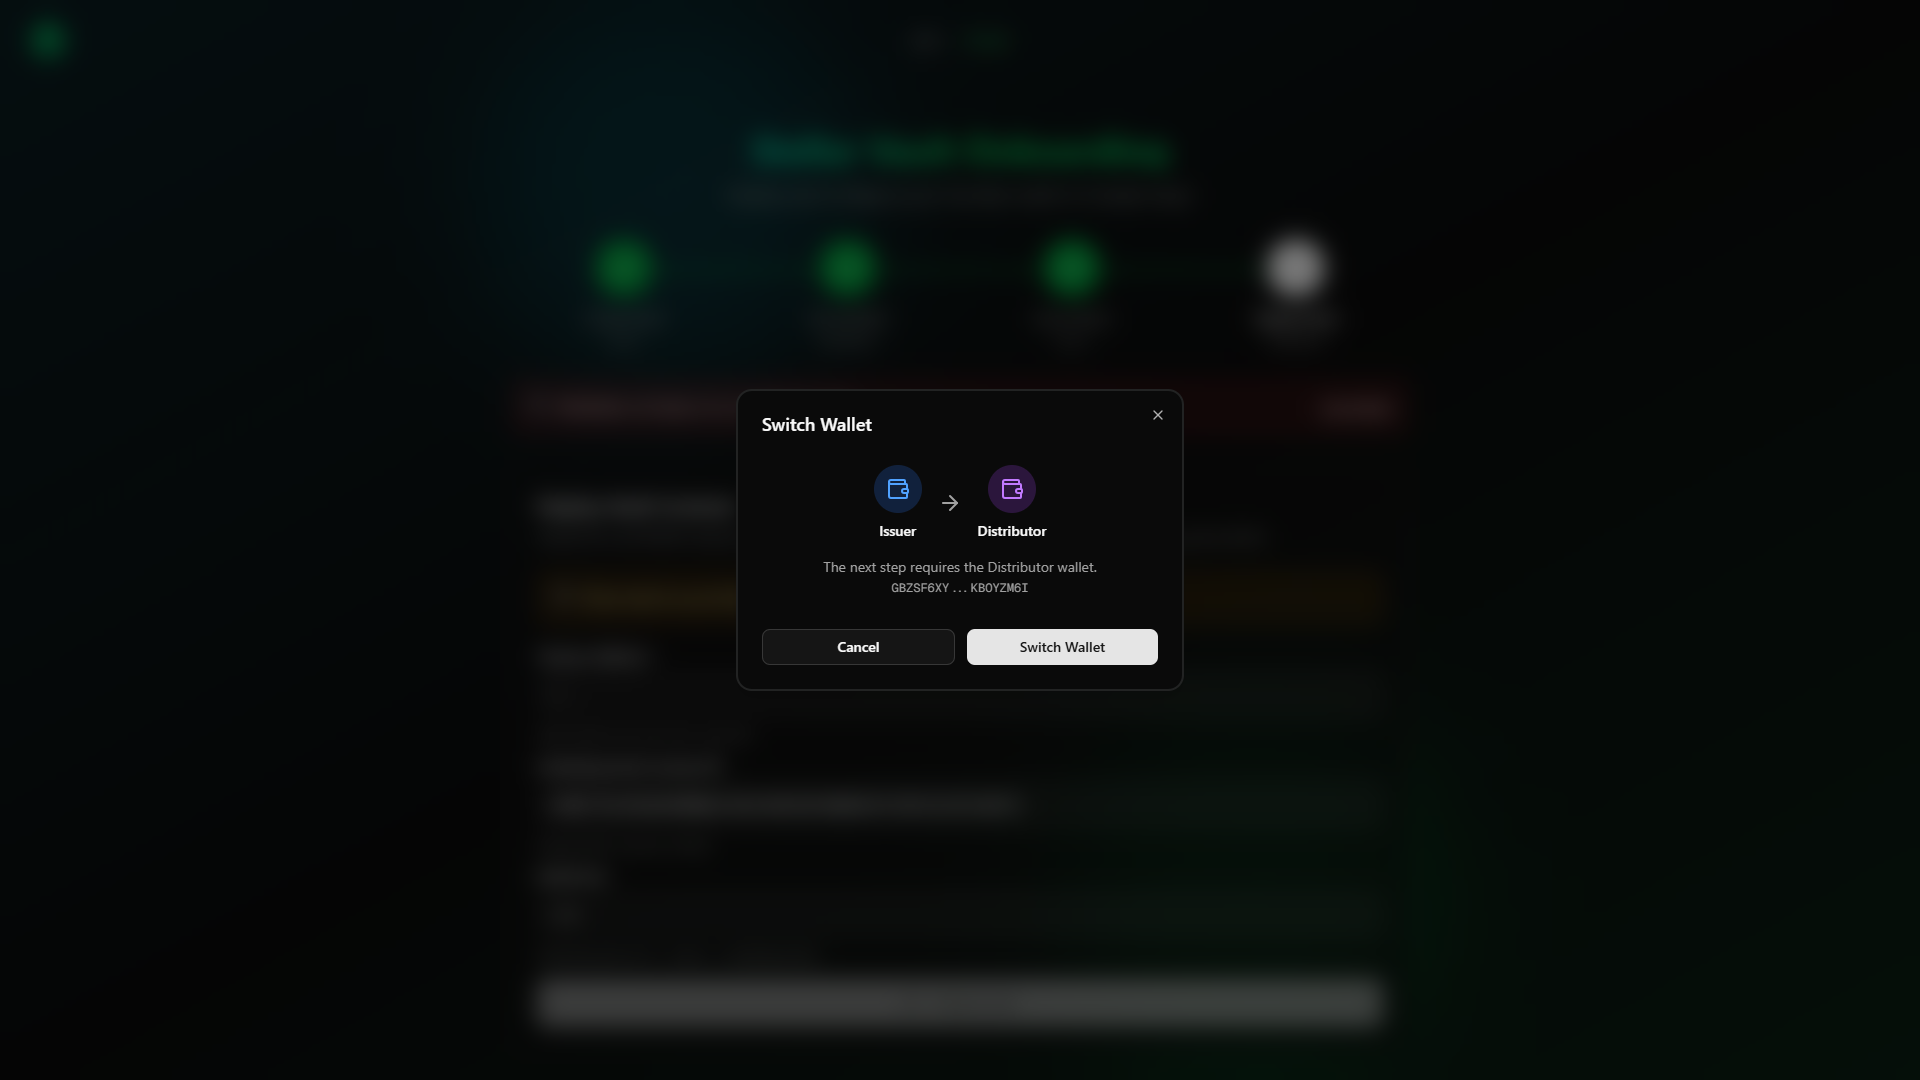
The wizard automatically prompts you to switch wallets when the required role changes between steps.
Prerequisites
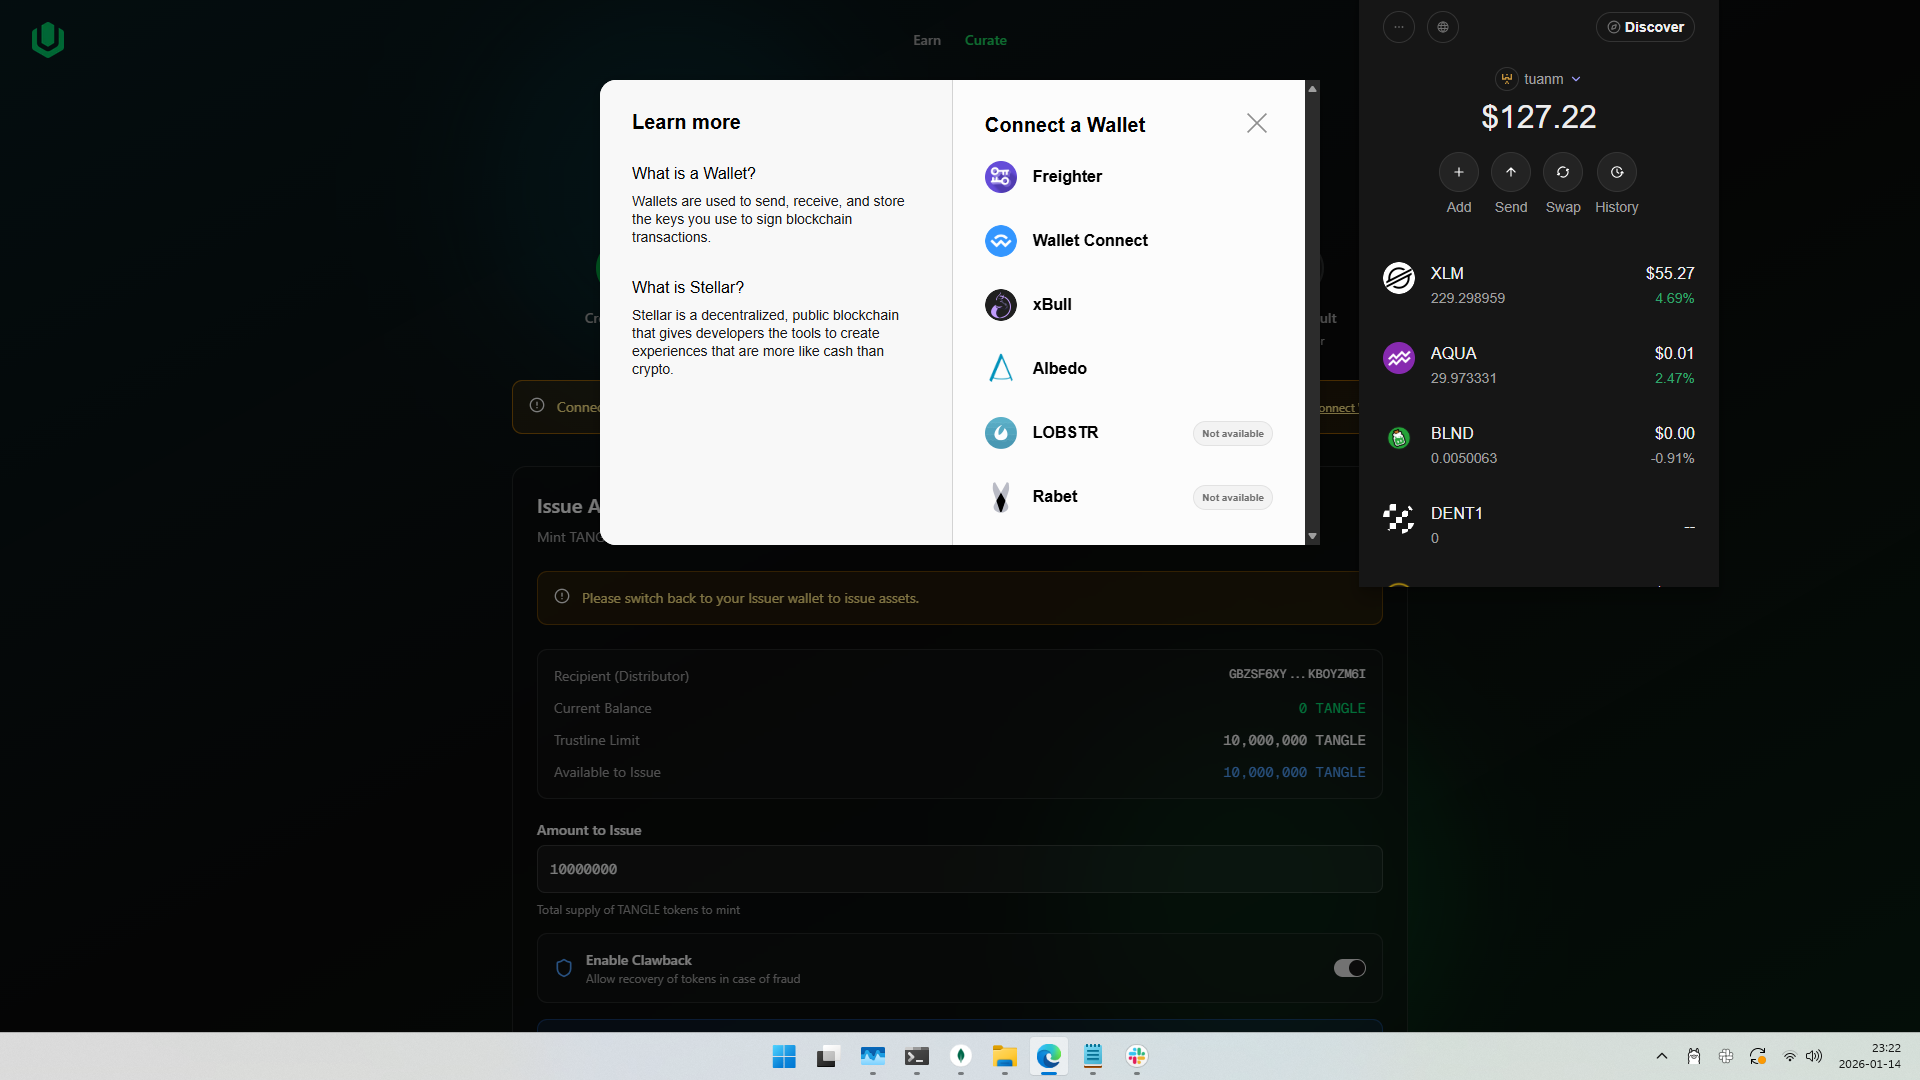
- Freighter Wallet: Install and unlock the Freighter wallet browser extension
- Two Wallet Addresses: Prepare two separate Stellar addresses (Issuer and Distributor)
- XLM Balance: Ensure both wallets have sufficient XLM for transaction fees (minimum 5 XLM recommended per wallet)
- Network: Connect to the appropriate network (Testnet for testing, Mainnet for production)
On Testnet, the wizard will prompt you to fund unfunded wallets via Friendbot automatically.
Step 1 — Create Stellar Asset Contract
Wallet Role: Issuer
In this step, you deploy a Stellar Asset Contract (SAC) that wraps your classic Stellar asset for Soroban compatibility.
Instructions
- Connect your Issuer wallet via Freighter
- Enter your Asset Code (1-12 alphanumeric characters, e.g.,
USDYC)- The asset symbol will be automatically converted to uppercase
- Your connected wallet address is displayed as the Issuer Address
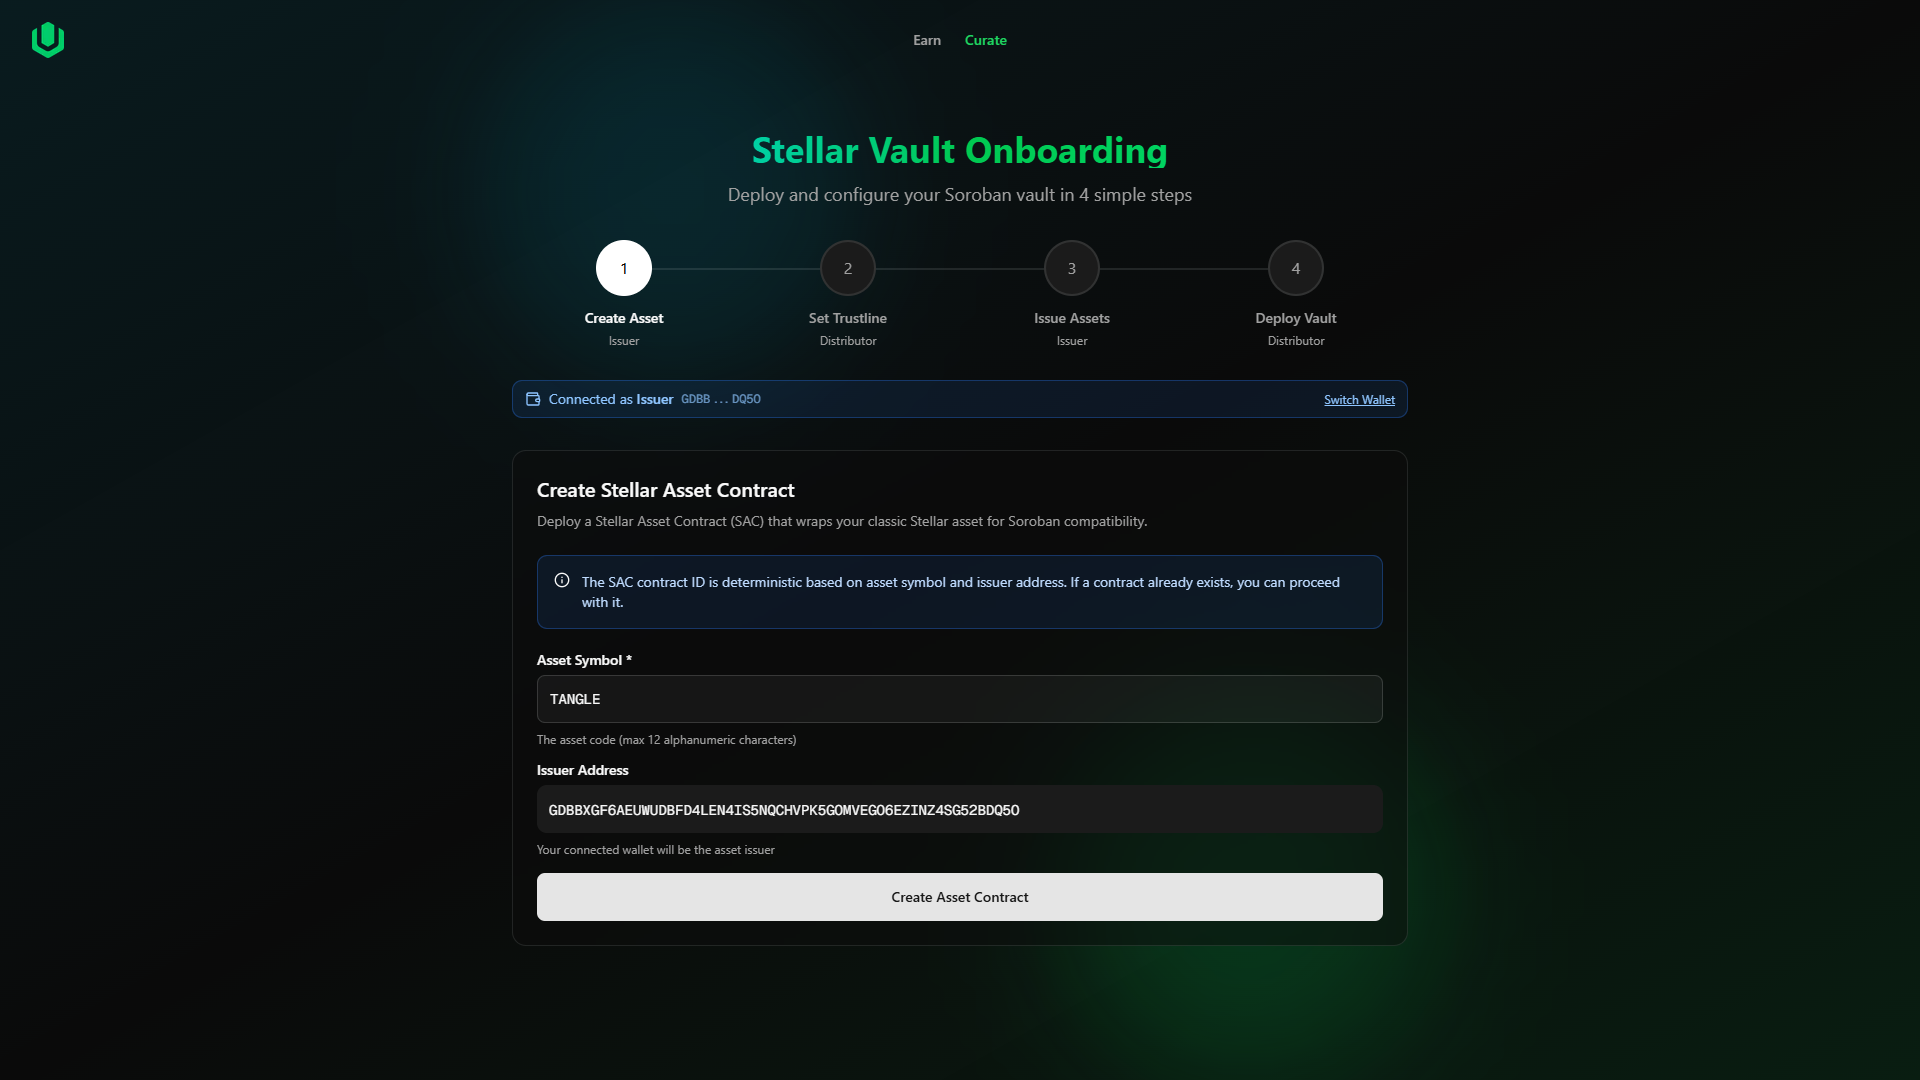
- Click "Create Asset Contract"
- Confirm the transaction in Freighter
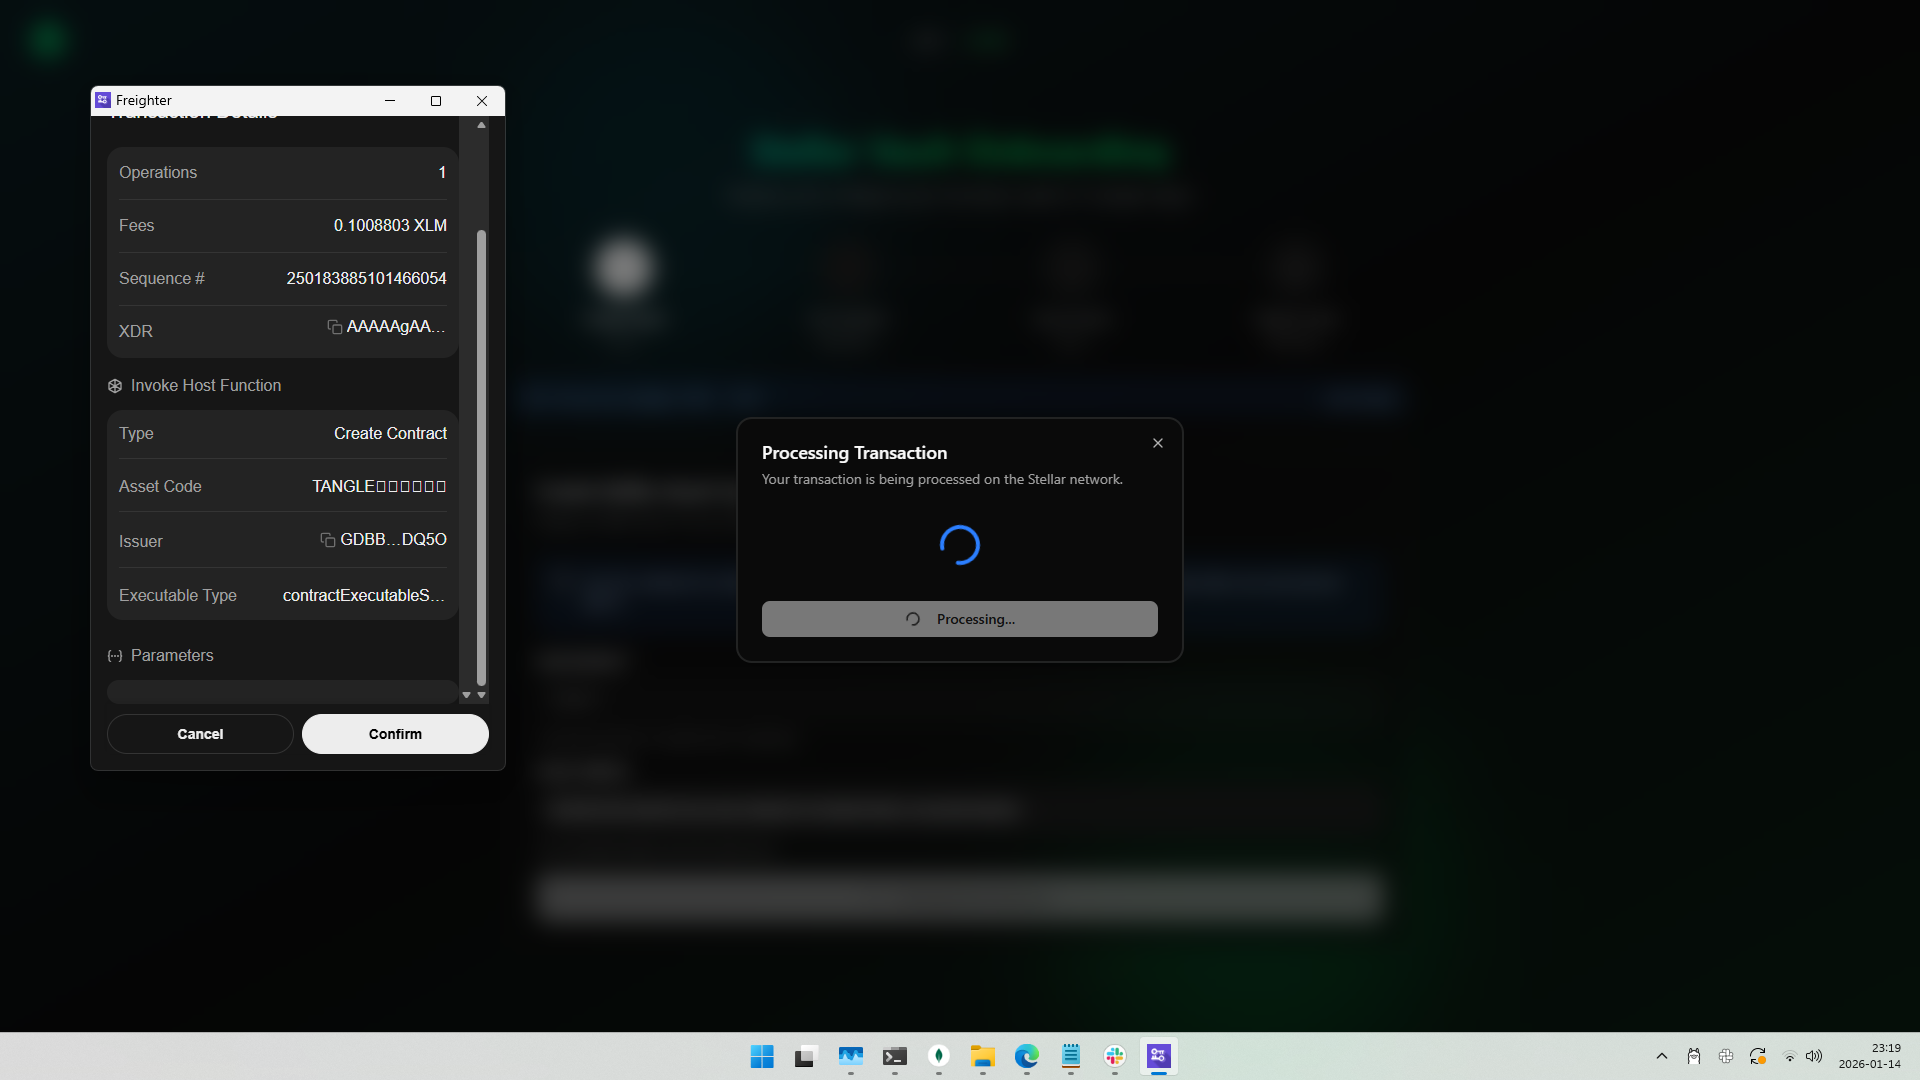
- Wait for the transaction to complete
- Click "Done" to proceed to the next step
If an asset contract already exists for your symbol and issuer combination, you'll see an option to use the existing contract and continue.
Output
- Asset Contract ID: The Soroban contract address for your asset (save this!)
Step 2 — Set Trustline
Wallet Role: Distributor
The Distributor wallet must establish a trustline to receive tokens from the Issuer.
Instructions
- When prompted, switch to your Distributor wallet
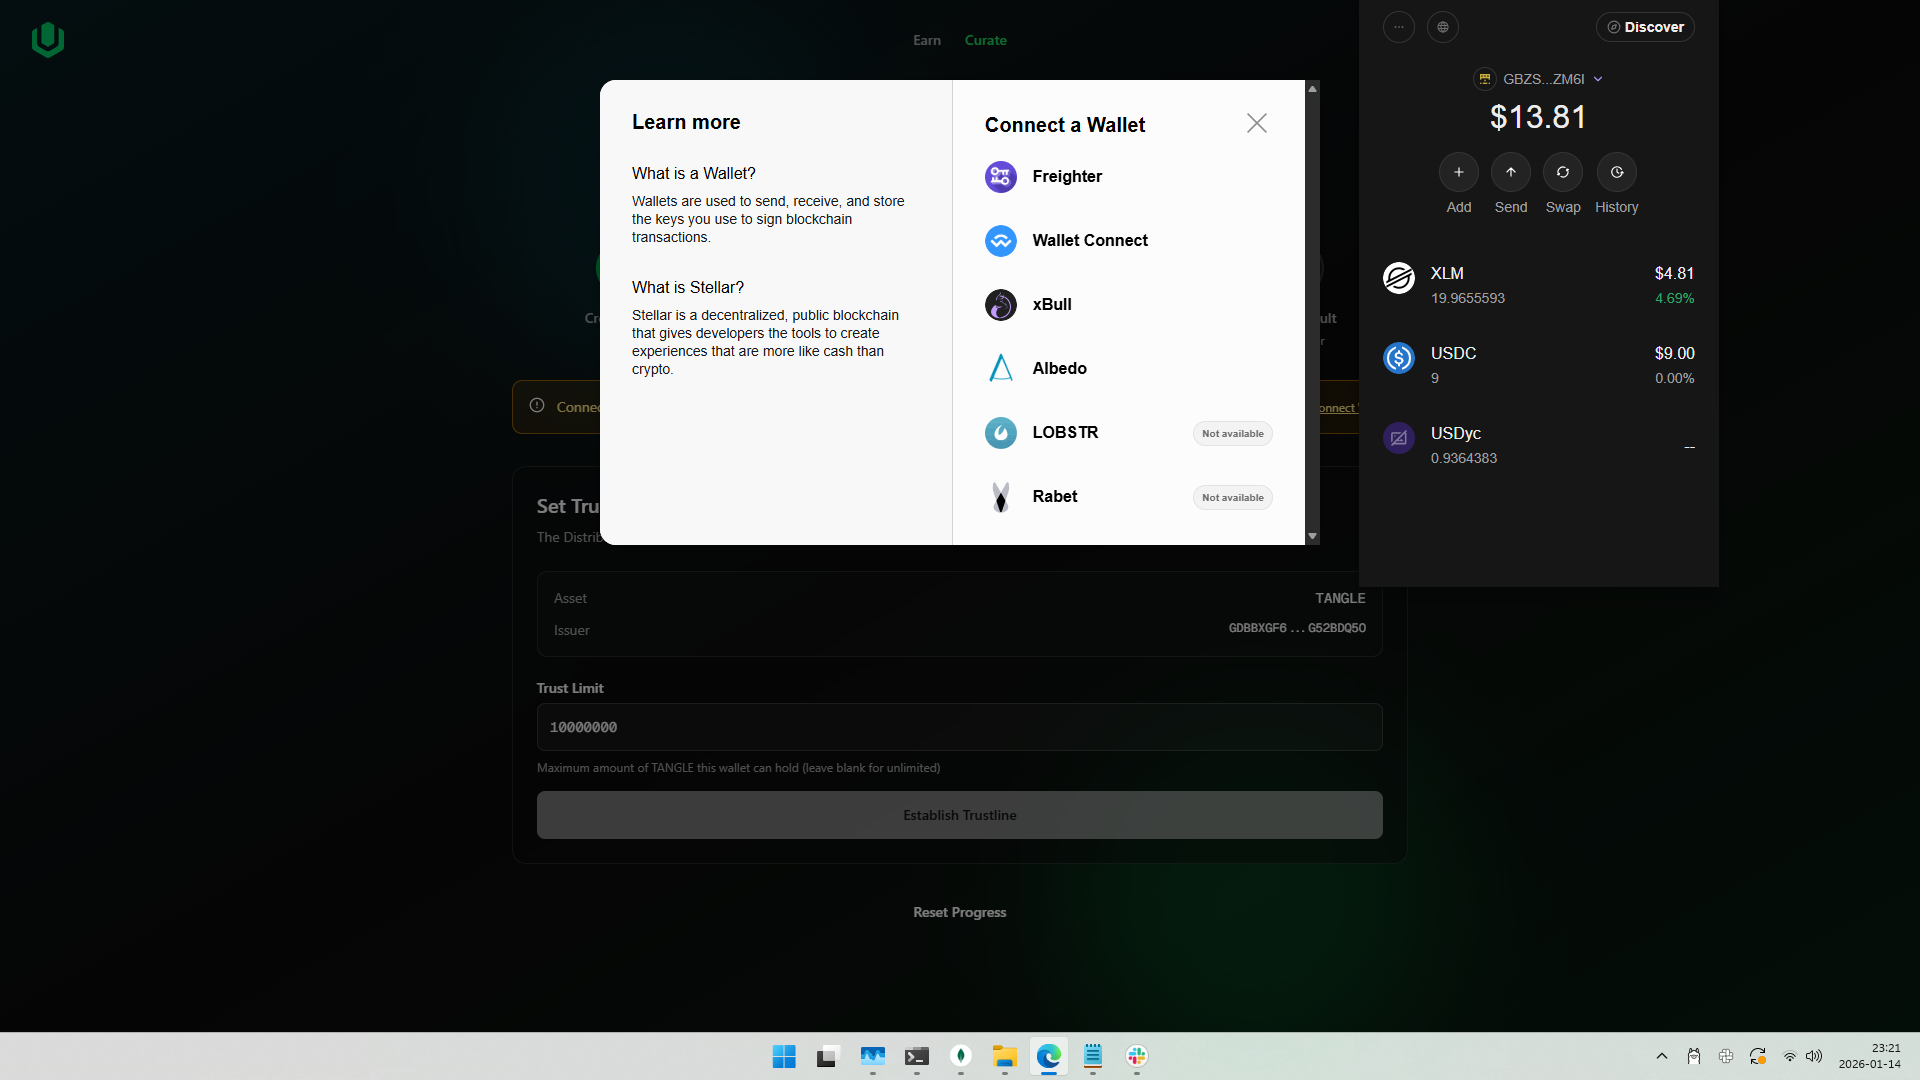
- Enter the Trust Limit (maximum amount of tokens this wallet can hold)
- Default: 10,000,000
- Clear the field for unlimited
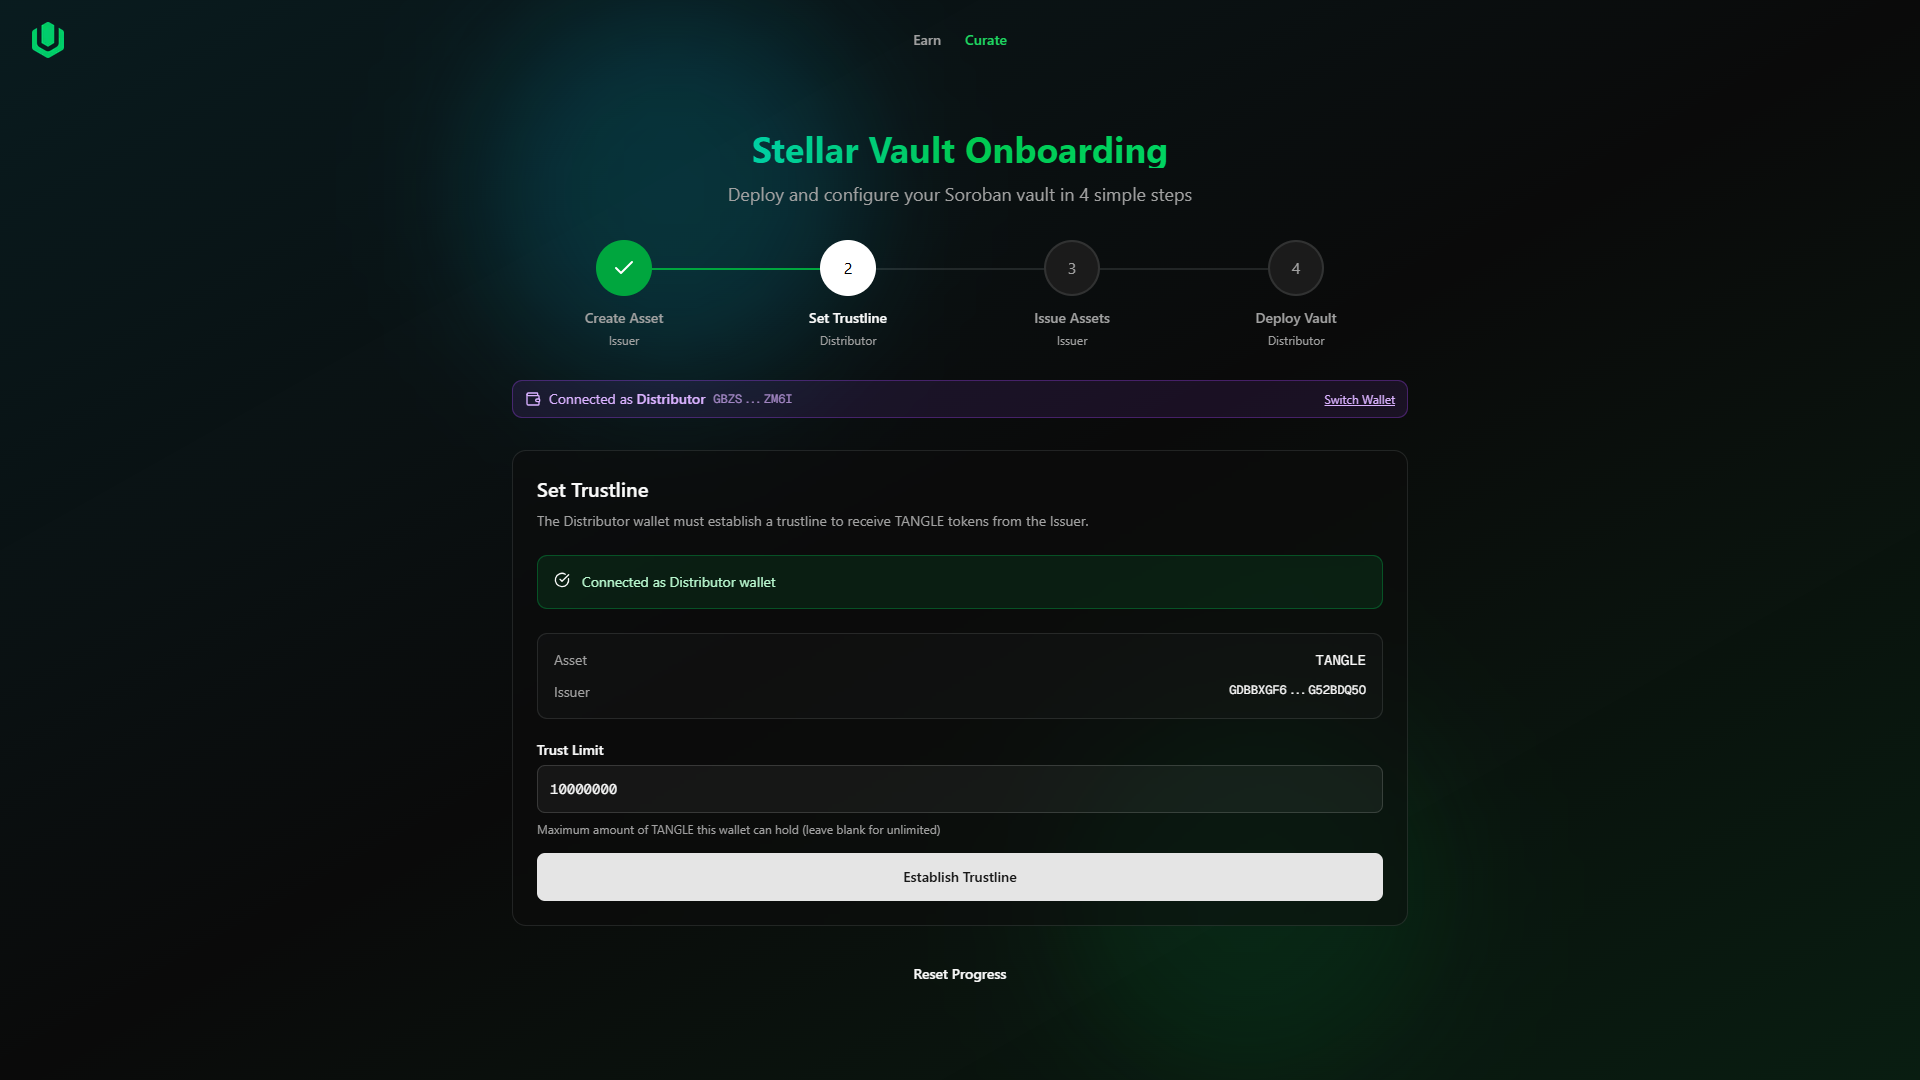
- Click "Establish Trustline"
- Confirm the transaction in Freighter
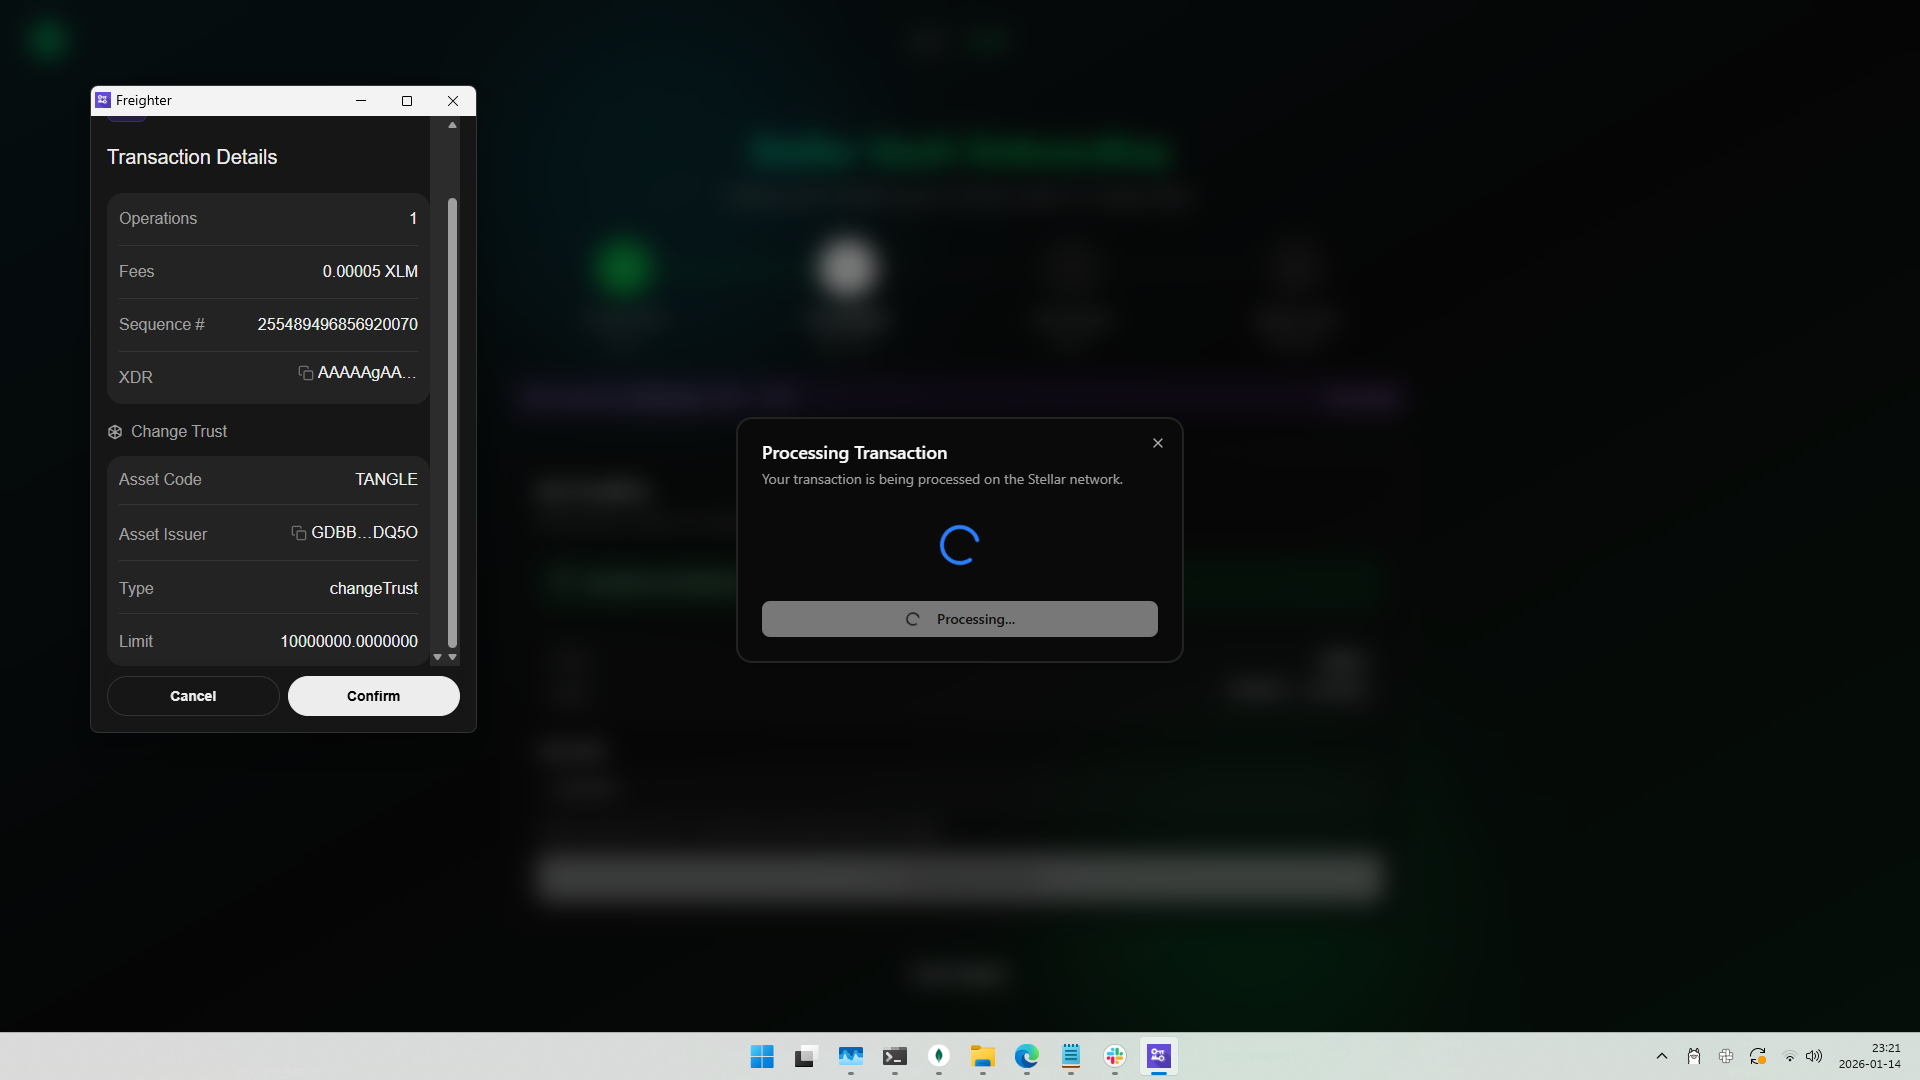
- Wait for the transaction to complete

- Click "Done" to proceed
If the Distributor already has tokens from a previous setup, the wizard will detect this and offer to skip Steps 2 and 3.
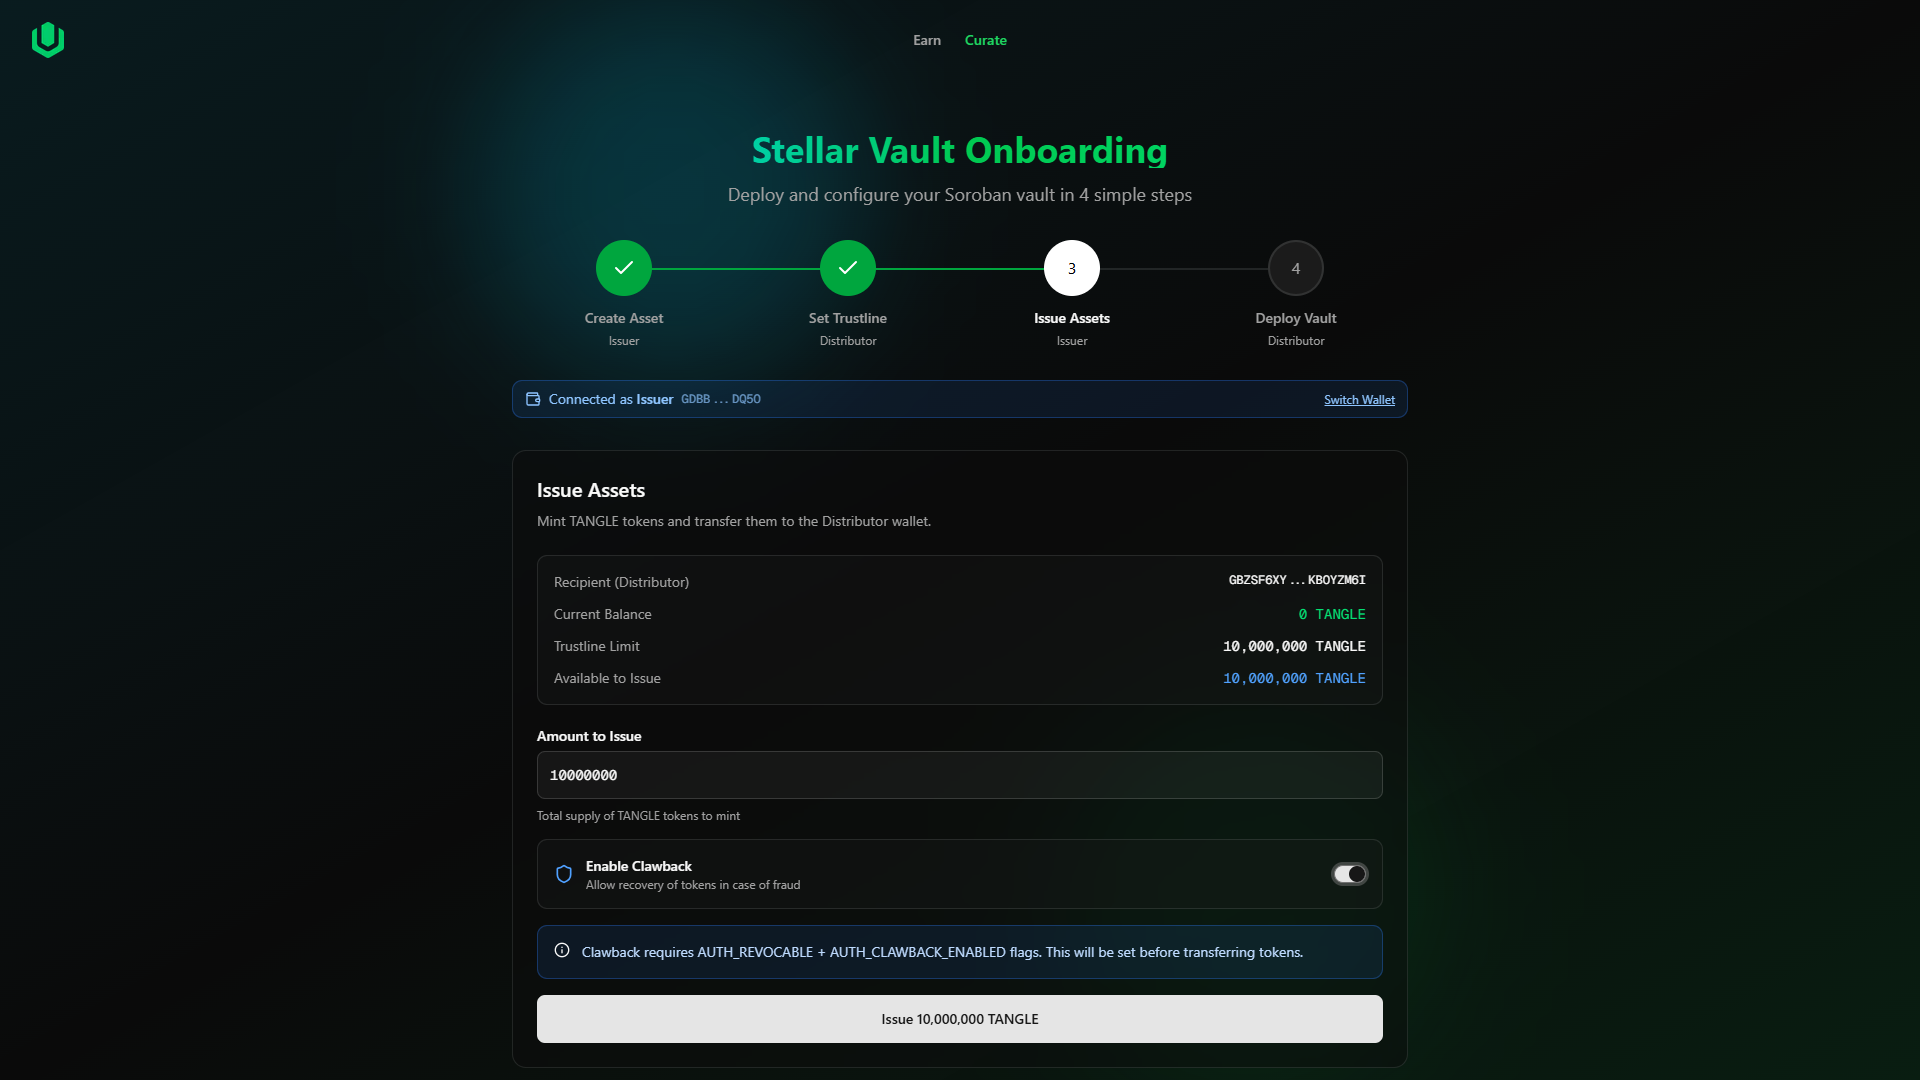
Step 3 — Issue Assets
Wallet Role: Issuer
Mint tokens and transfer them to the Distributor wallet.
Instructions
- When prompted, switch back to your Issuer wallet
- Enter the Amount to Issue (total supply of tokens to mint)
- Default: 10,000,000
-
(Optional) Toggle Enable Clawback to allow token recovery in case of fraud
- Enabled by default
- Sets
AUTH_REVOCABLE+AUTH_CLAWBACK_ENABLEDflags on the asset
-
Click "Issue [amount] [symbol]"
-
If clawback is enabled, first confirm the clawback flags transaction
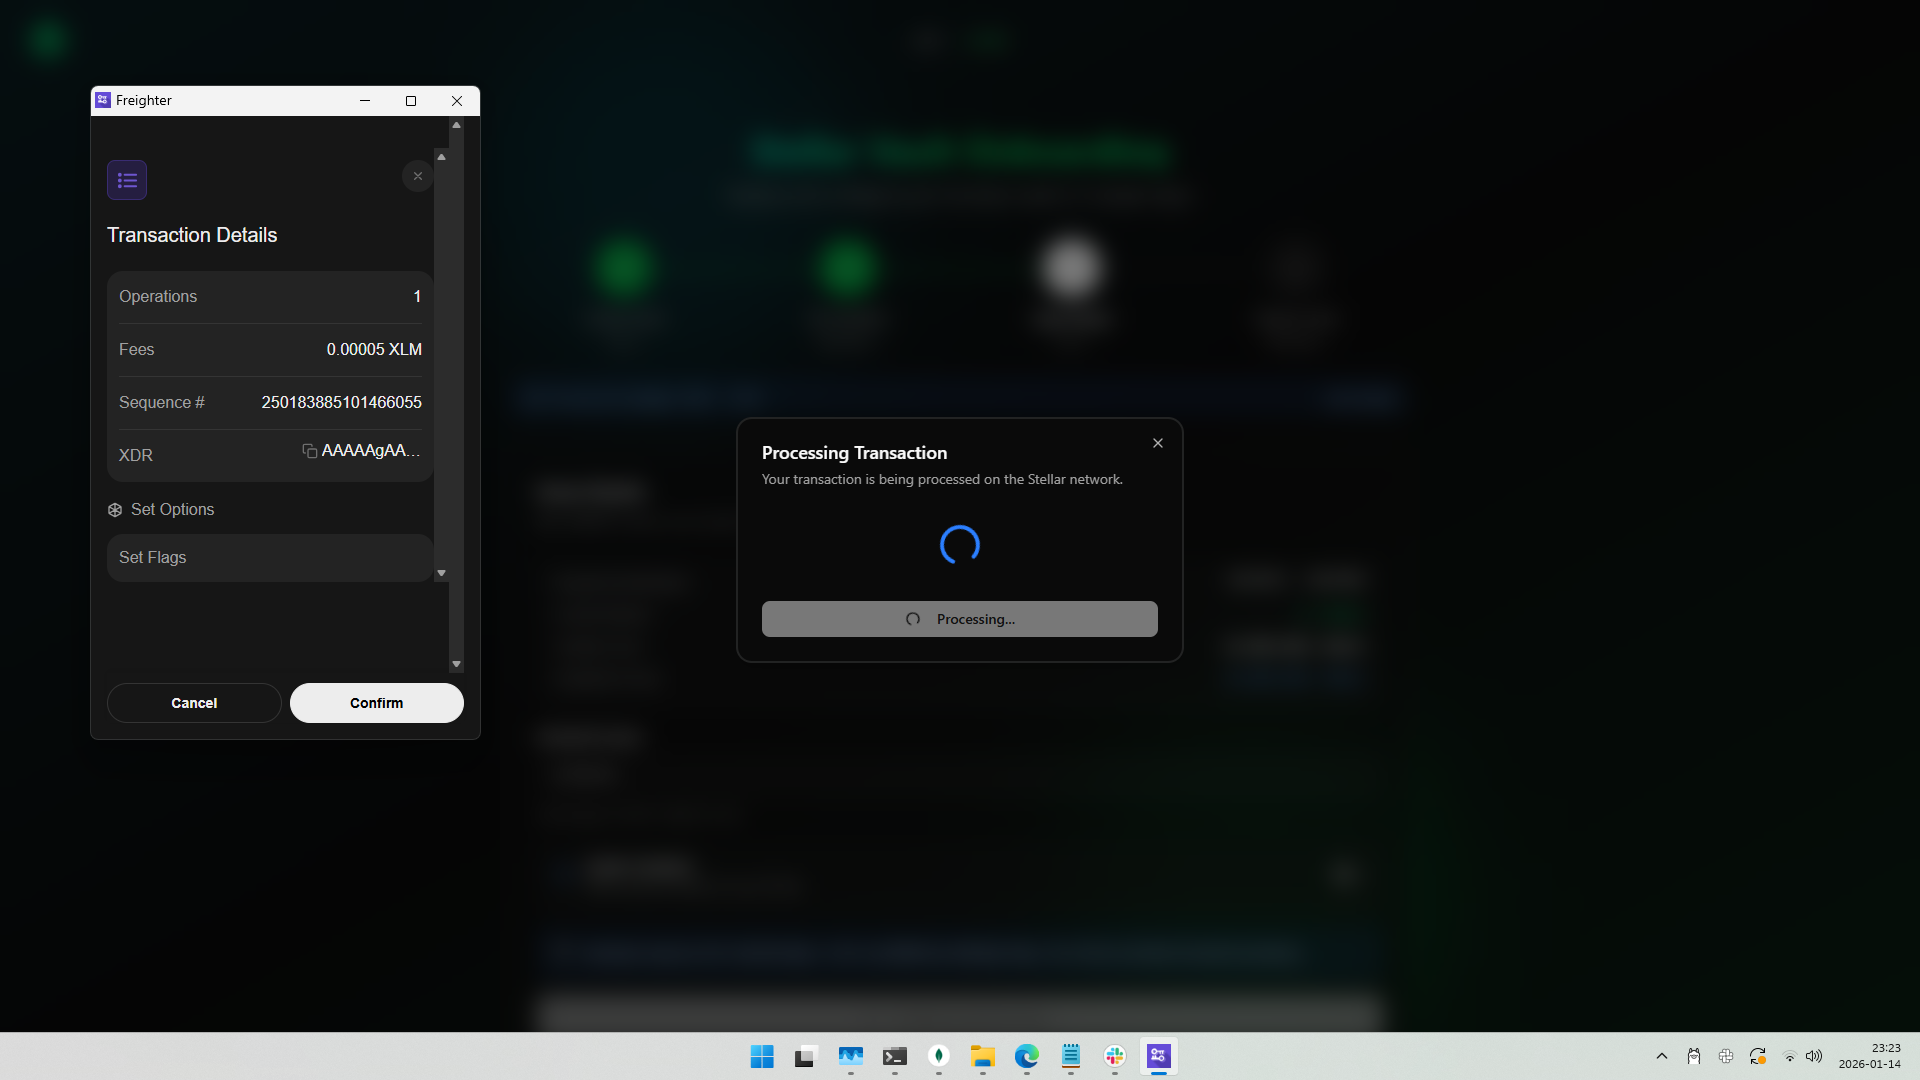
- Confirm the token transfer transaction
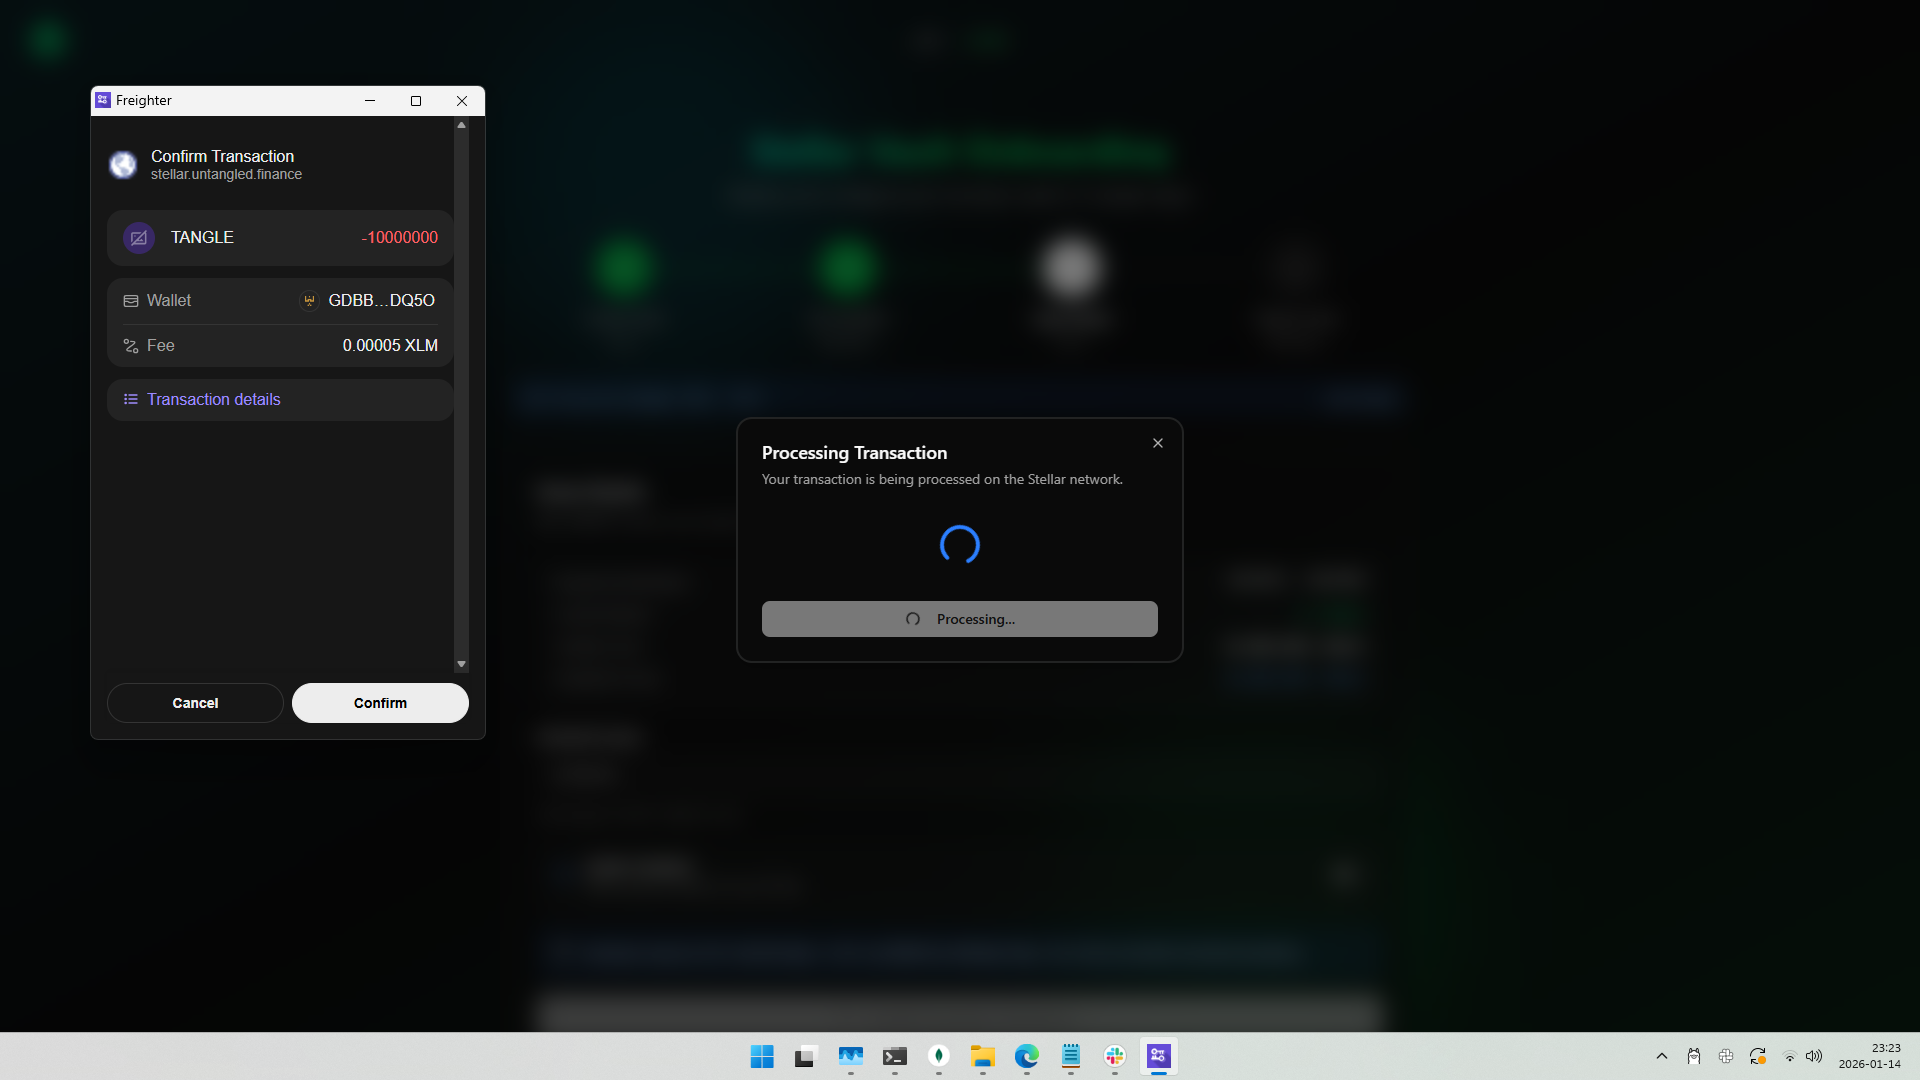
- Wait for the transaction to complete
- Click "Done" to proceed
Output
- Tokens are now in the Distributor wallet, ready for vault deployment
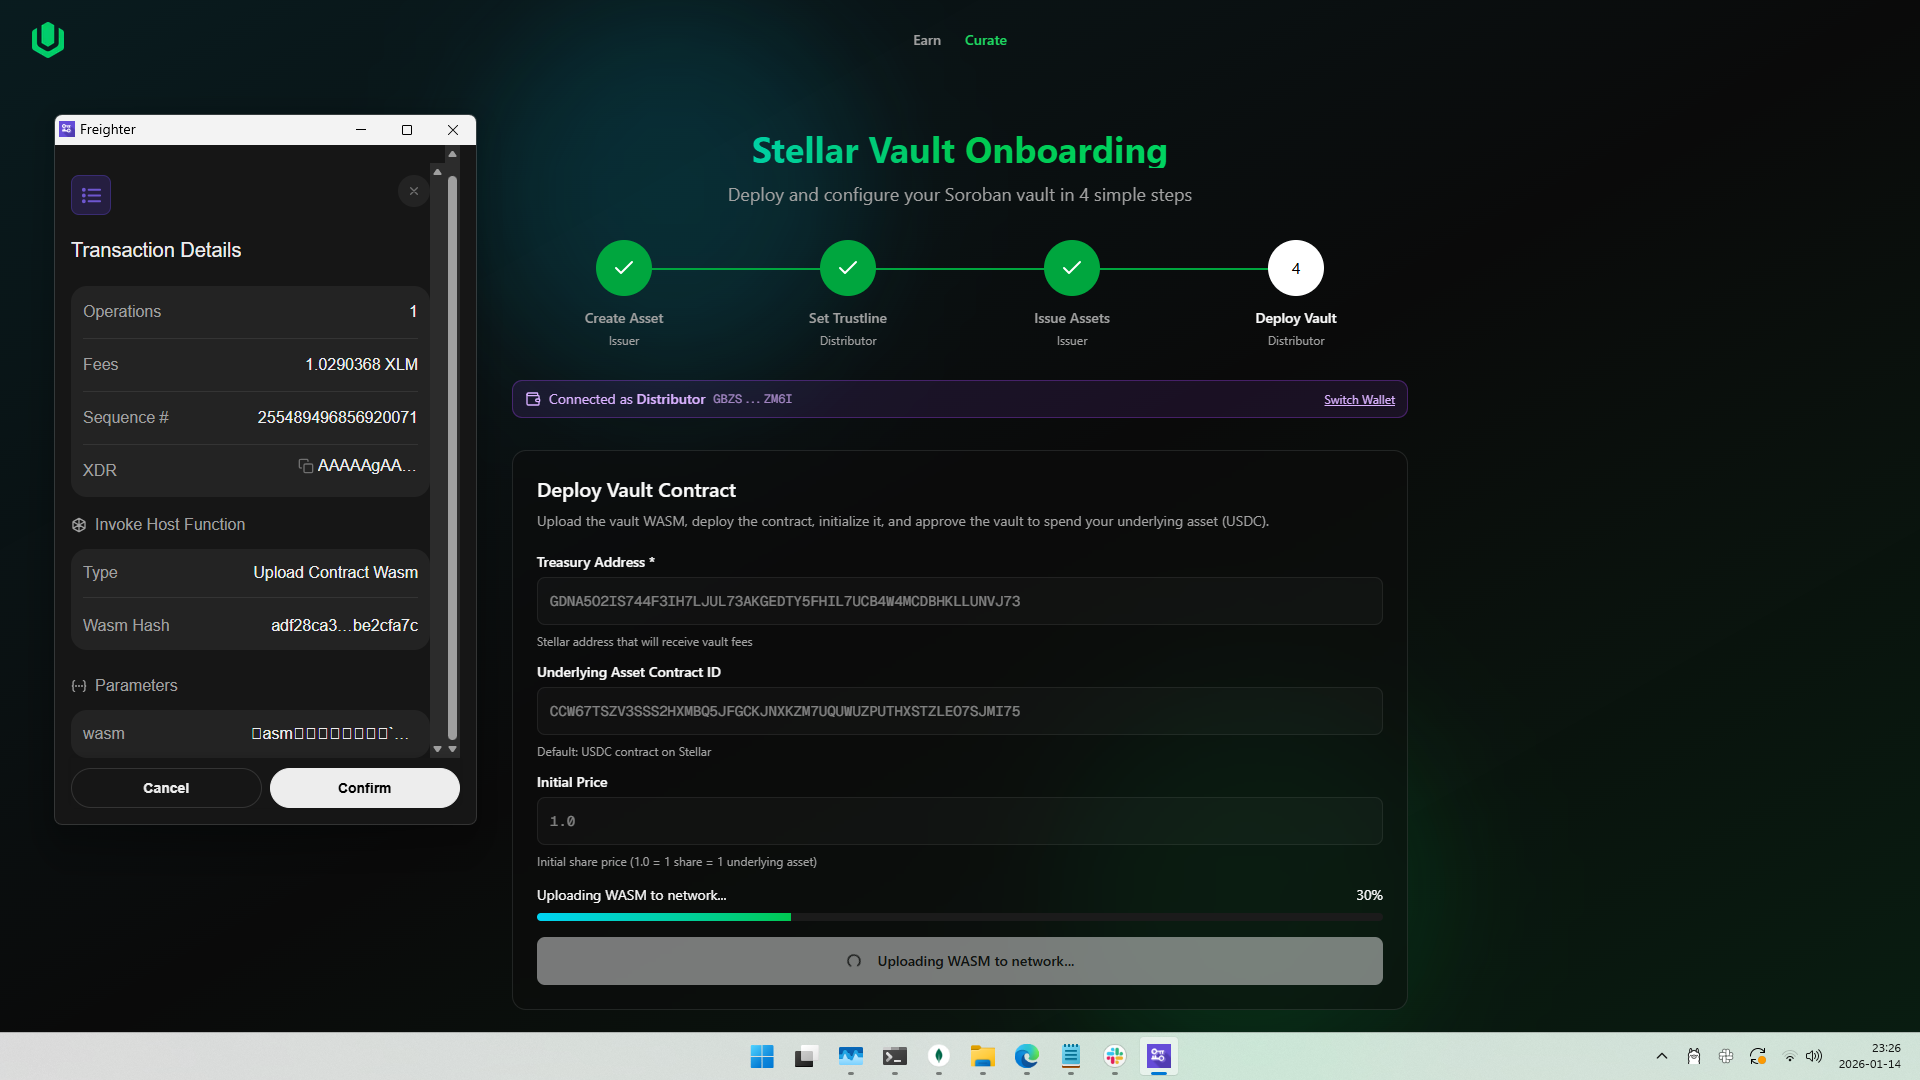
Step 4 — Deploy Vault
Wallet Role: Distributor
Upload the vault WASM, deploy the contract, initialize it, and approve the vault to spend your share tokens.
Instructions
- When prompted, switch to your Distributor wallet

- Enter the required parameters:
| Field | Description | Example |
|---|---|---|
| Treasury Address | Stellar address (G...) that receives deposited underlying assets | GXXXX...XXXX |
| Underlying Asset Contract ID | Contract ID of the asset users deposit (default: USDC) | CXXXX...XXXX |
| Initial Price | Starting share price (1.0 = 1 share = 1 underlying) | 1.0 |
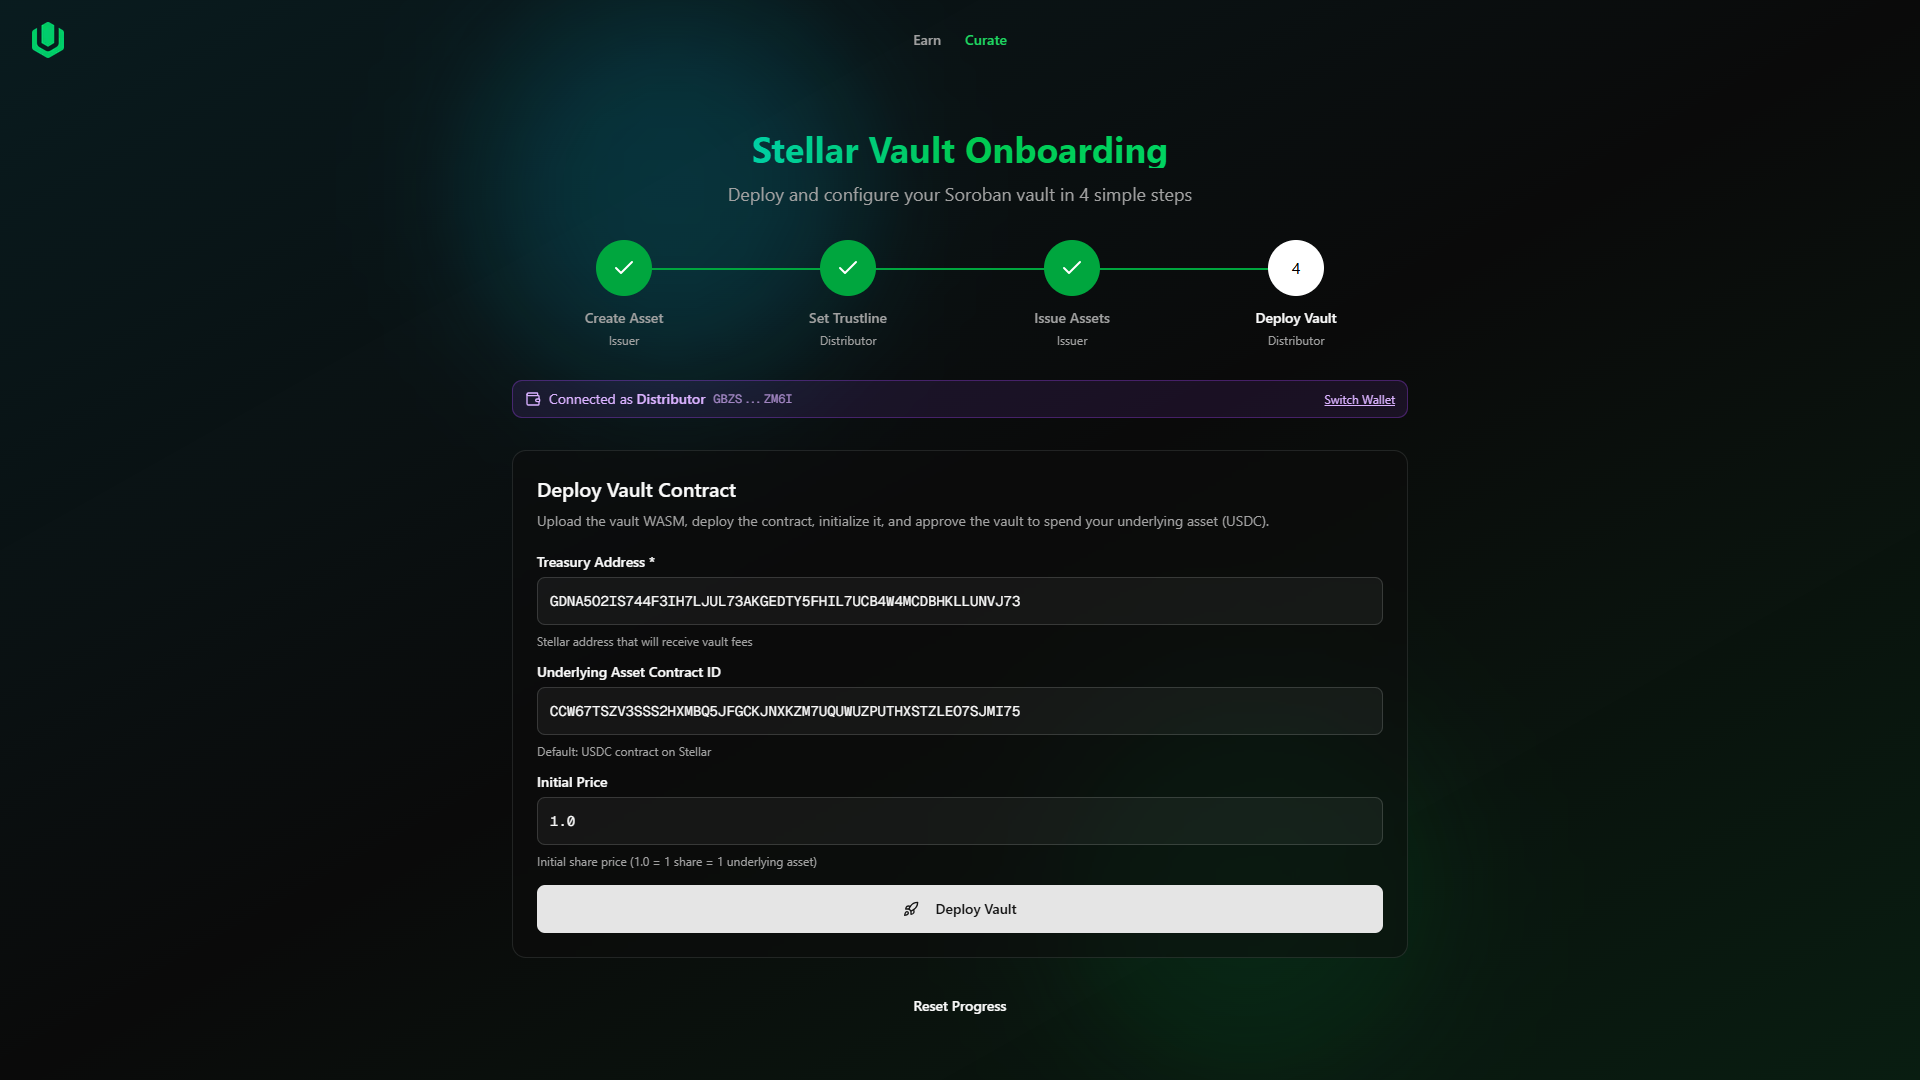
-
Click "Deploy Vault"
-
The deployment process involves multiple transactions. Confirm each in Freighter:
a. Upload Contract Code
b. Create Contract
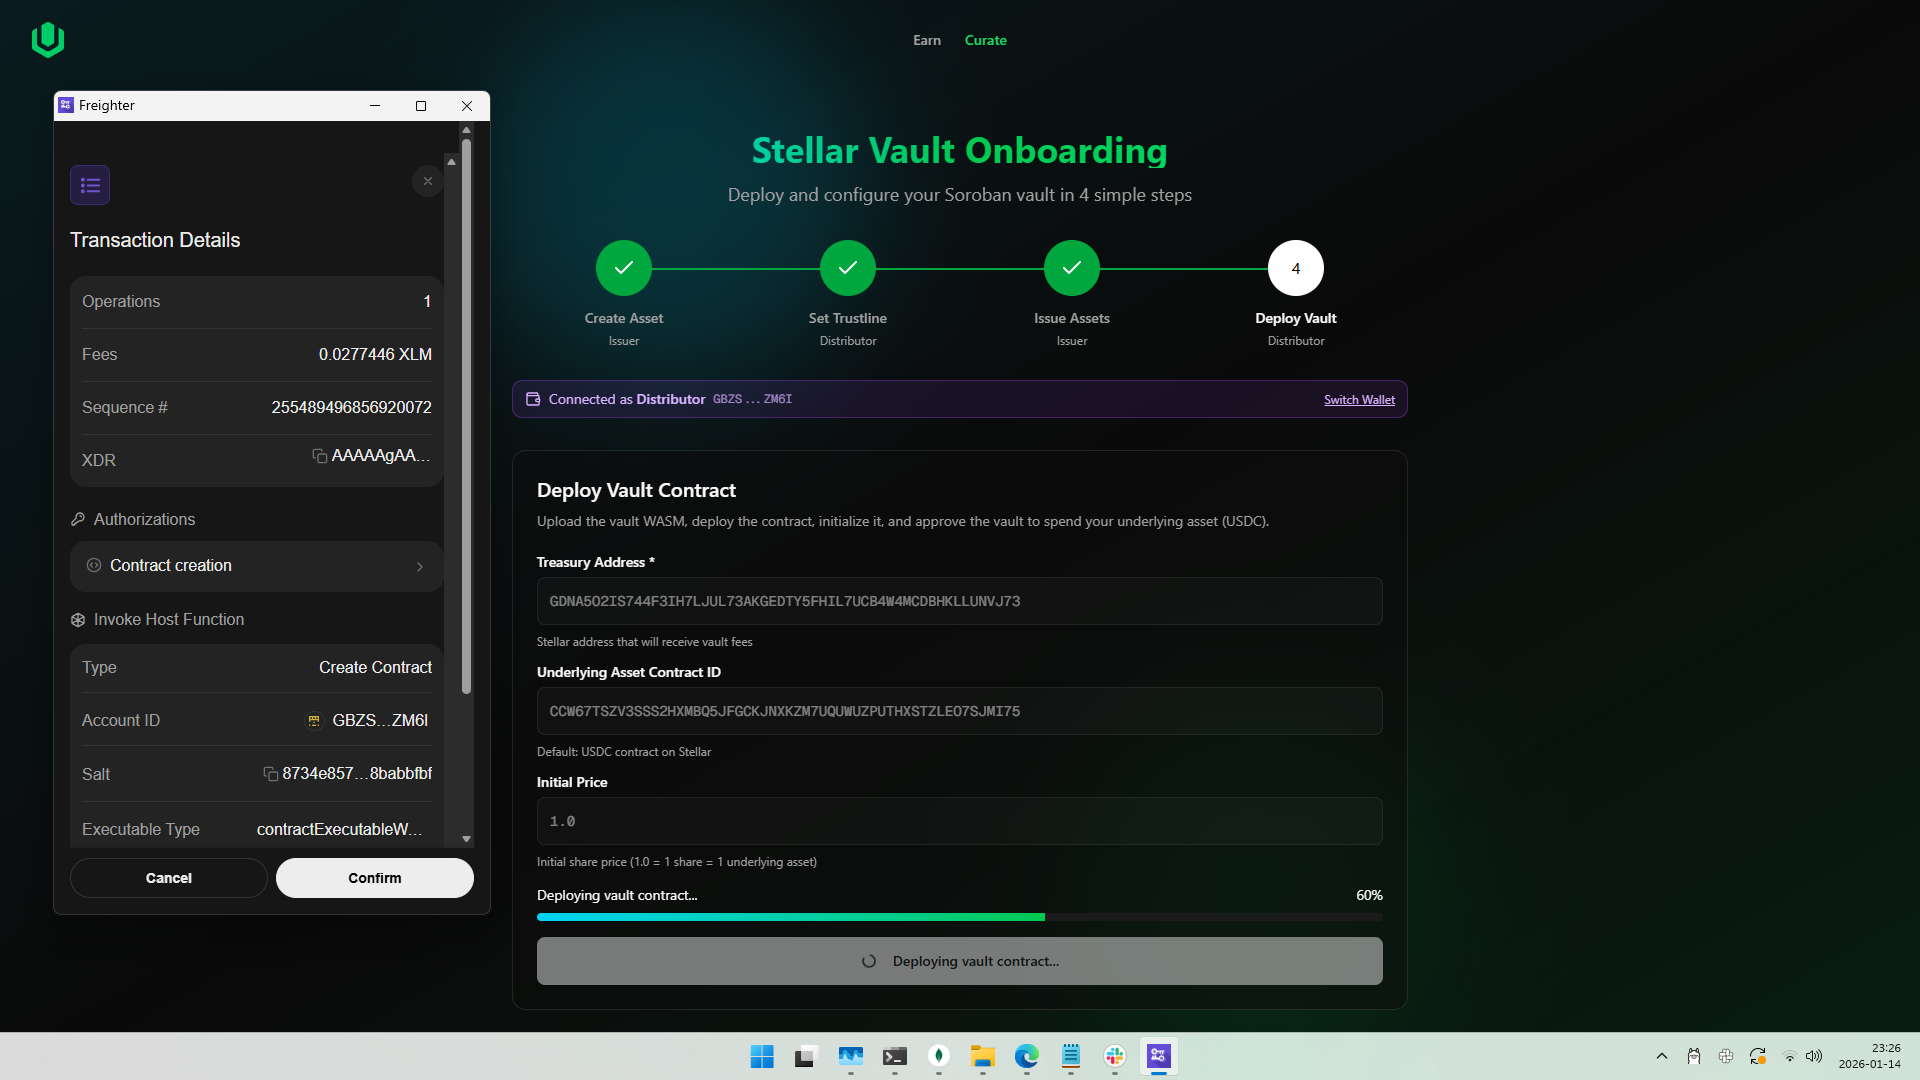
c. Initialize Vault
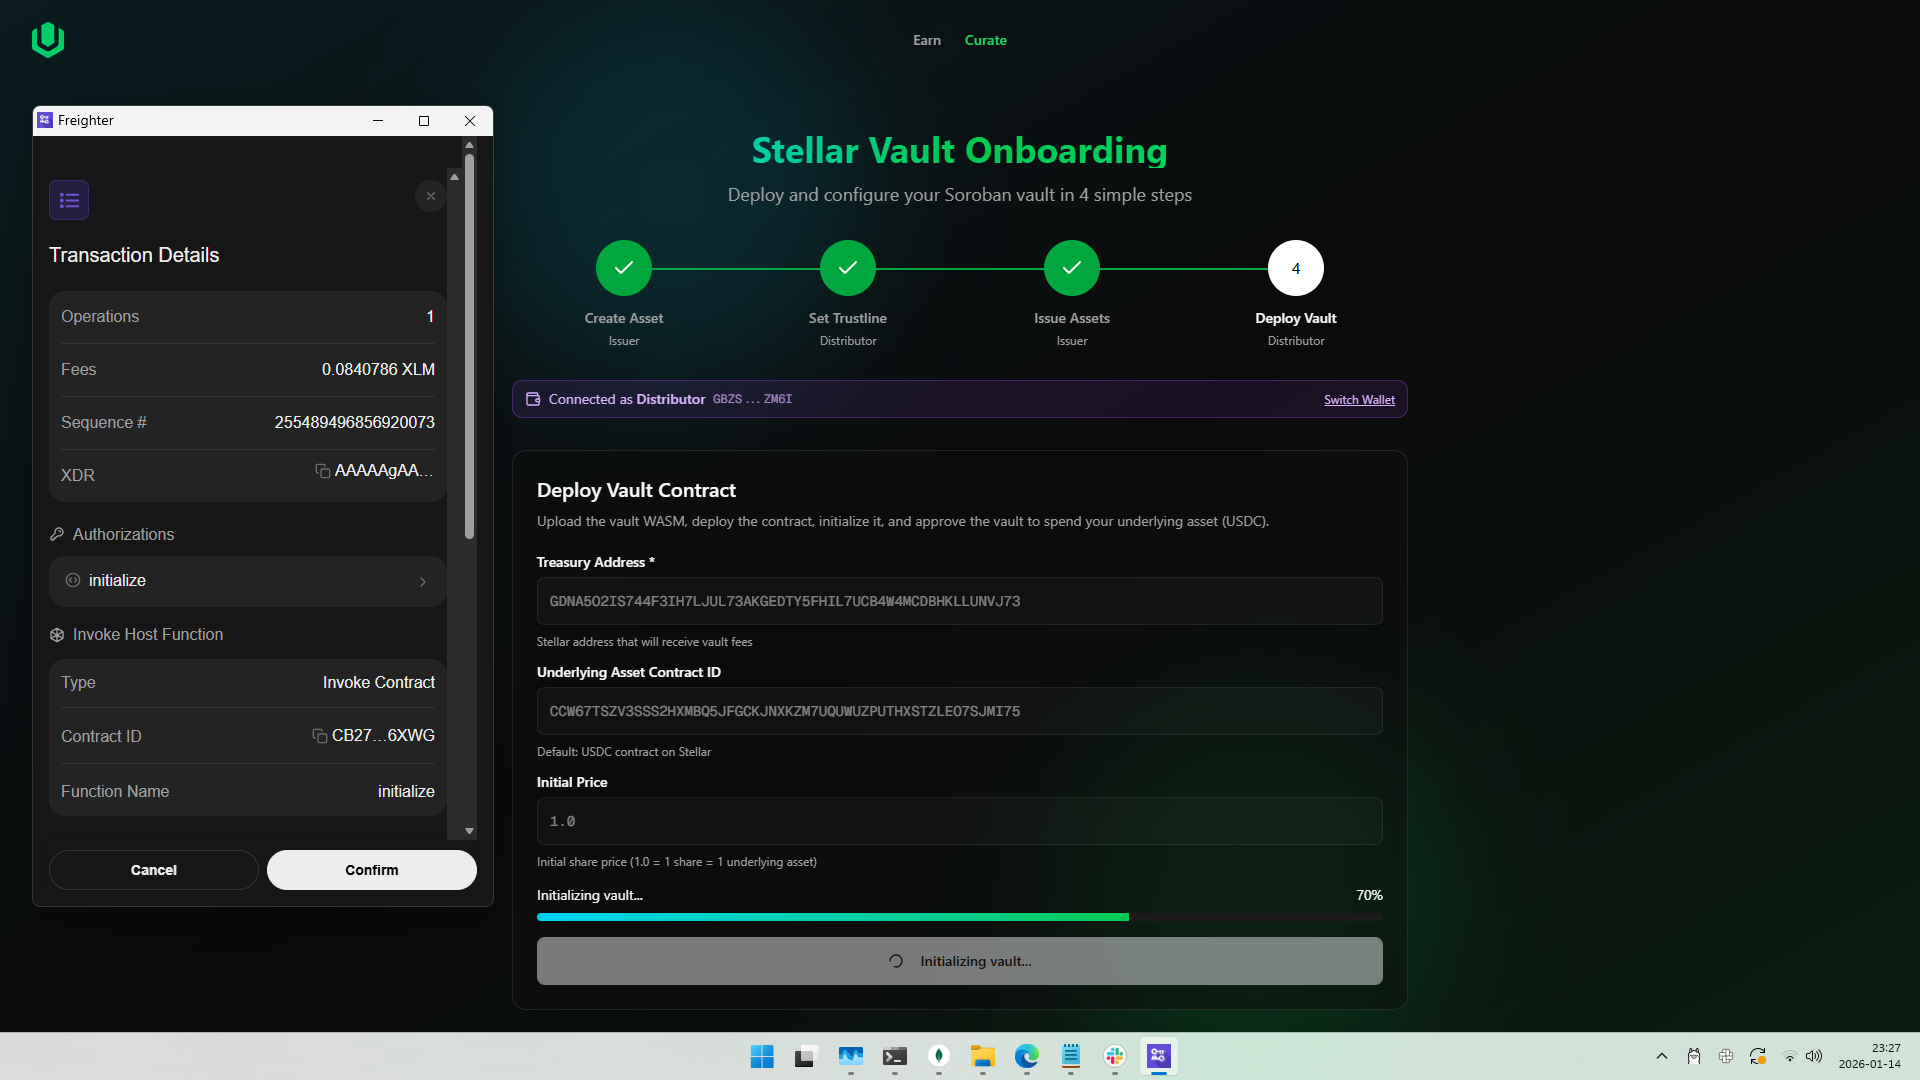
d. Approve Vault to Spend Share Tokens
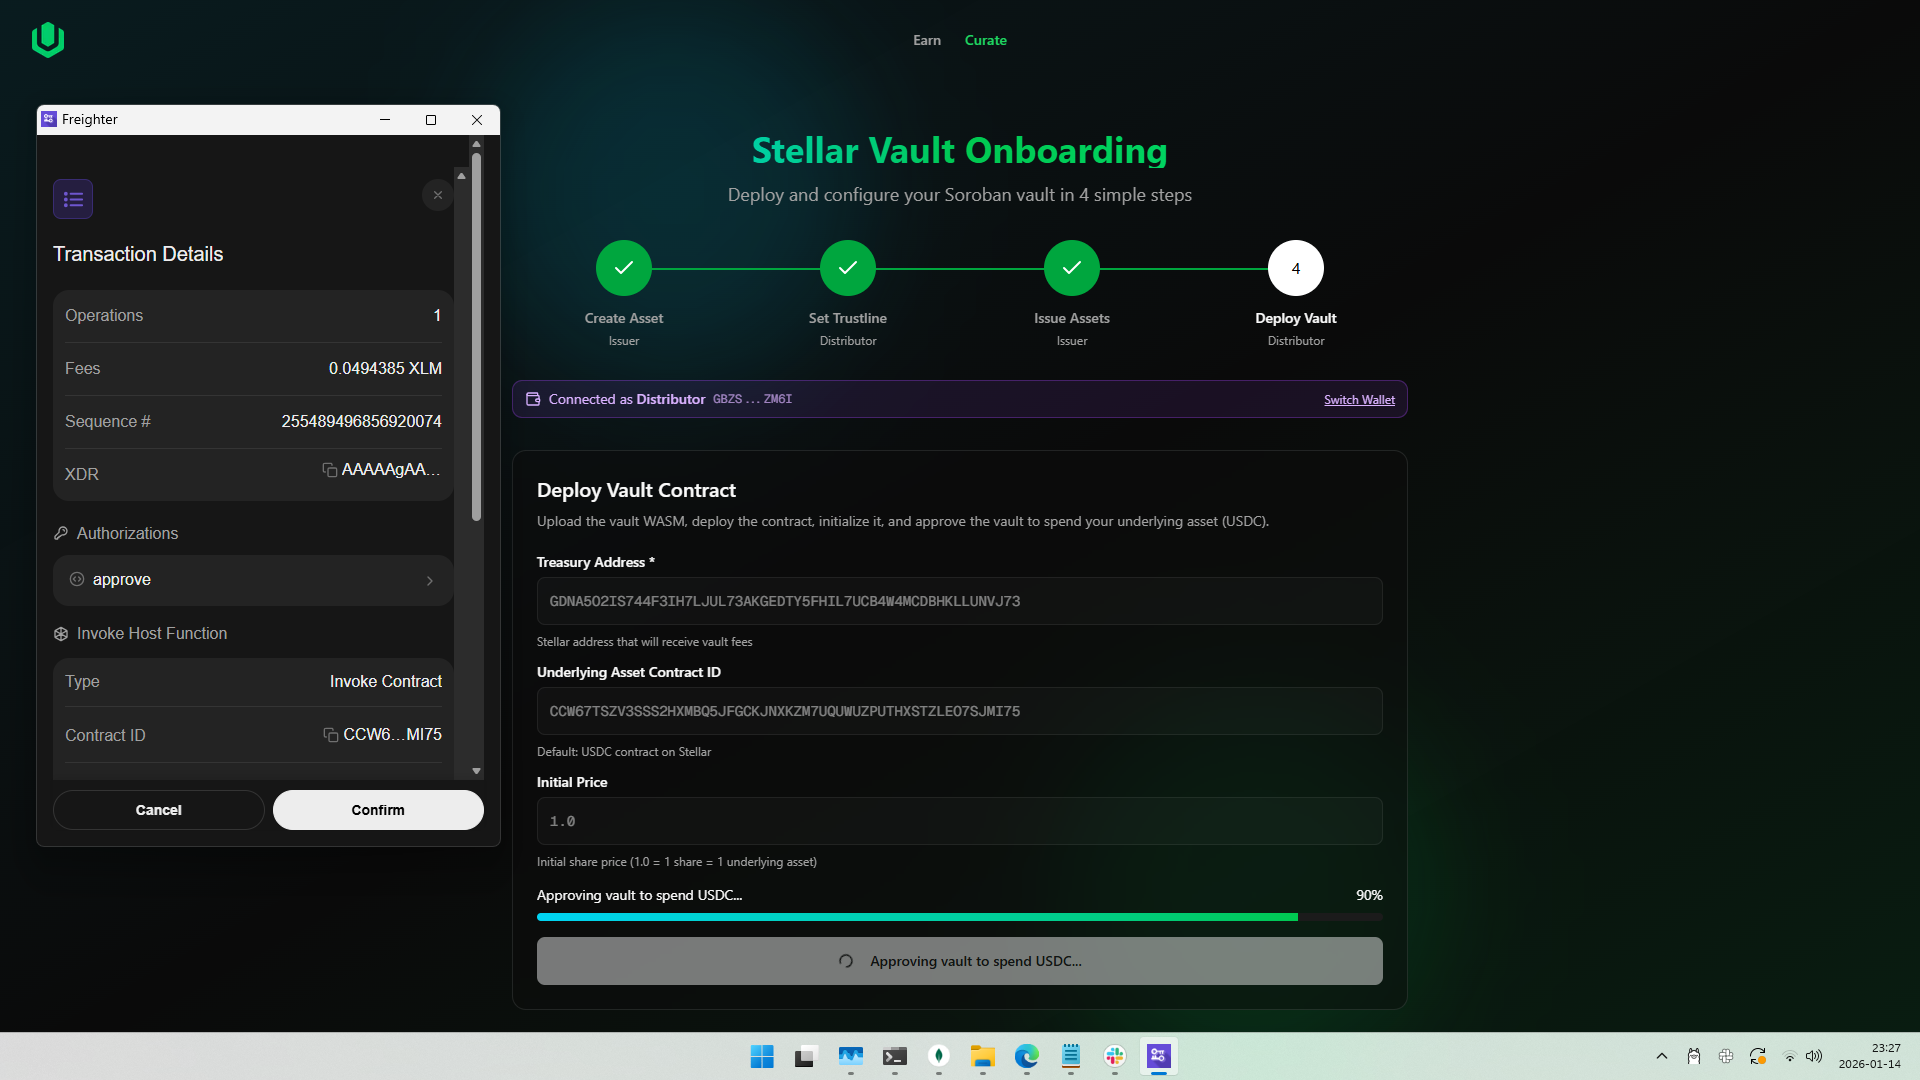
-
Wait for all transactions to complete
- Click "Complete Setup" to finish
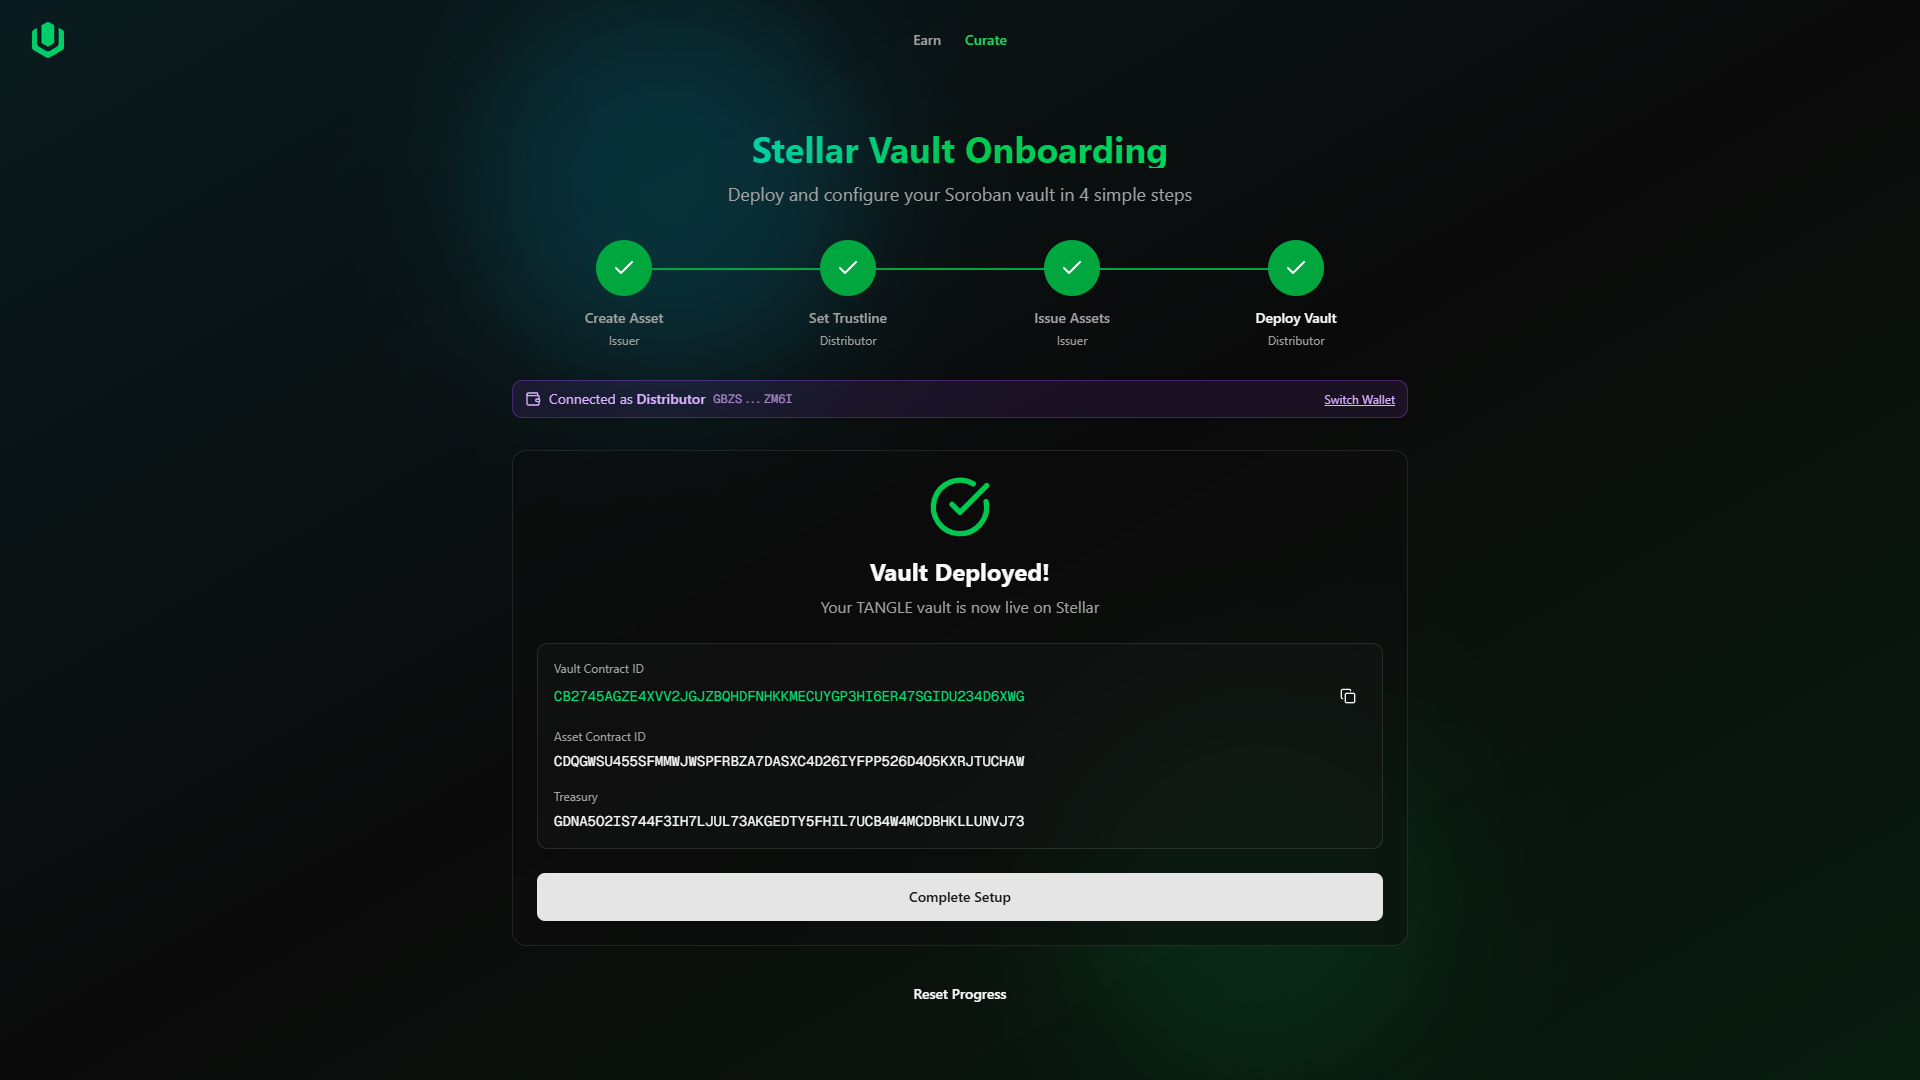
Output
- Vault Contract ID: Your deployed vault's Soroban contract address (save this!)
Summary
After completing all 4 steps, you will have:
| Item | Description |
|---|---|
| Asset Contract ID | Soroban contract wrapping your Stellar asset |
| Vault Contract ID | Your deployed OctoVault on Soroban |
| Share Tokens | Minted tokens in the Distributor wallet |
| Configured Treasury | Address receiving deposited underlying assets |
Save both the Asset Contract ID and Vault Contract ID. You will need these to interact with your vault programmatically or configure it in the curator dashboard.
Troubleshooting
| Issue | Solution |
|---|---|
| Deposit fails with a new vault | Add underlying asset (USDC) to Treasury, enabling it to accept the underlying asset |
| Transaction fails | Check wallet connection, network status, and XLM balance; then retry |
| Wrong wallet connected | Use the wallet switch prompt or manually switch in Freighter |
| Insufficient XLM | Fund your wallet with at least 5 XLM for all transactions |
| Asset already exists | Use the "Use Existing Contract & Continue" option |
| Account not found (404) | Wallet needs initial funding; use Friendbot on Testnet |
Resume Progress
The wizard automatically saves your progress. If you close the browser or navigate away:
- Return to the onboarding page
- A dialog will appear asking if you want to resume or start fresh
- Choose Resume to continue from where you left off
- Choose Start Fresh to reset and begin again
Use the Reset Progress button at the bottom of the wizard to clear saved state and start over.